E-30
Setting Up the Camera Using an RM-P2580
CAMERA TITLE Setup
Use the CAMERA TITLE screen to set the title of each camera.
Titles can be up to 16 characters in length and are displayed at the bottom left of the picture.
SETUP
MENU SET
SPEED
IRIS
AF
FOCUS
ZOOM
OPEN
FAR
TELE CLEAR
/HOME
7
4
1
8
0
5
2
9
6
3
ENTER
AUTO
PAN
OPTION
1
OPTION
2
CAMERA
POSI-
TION
AUTO
PATROL
CLOSE
NEAR
WIDE
AUTO F-1 F-2 F-3
PAN/TILTLENS
CAMERA/POSITION
CAMERA POSITION
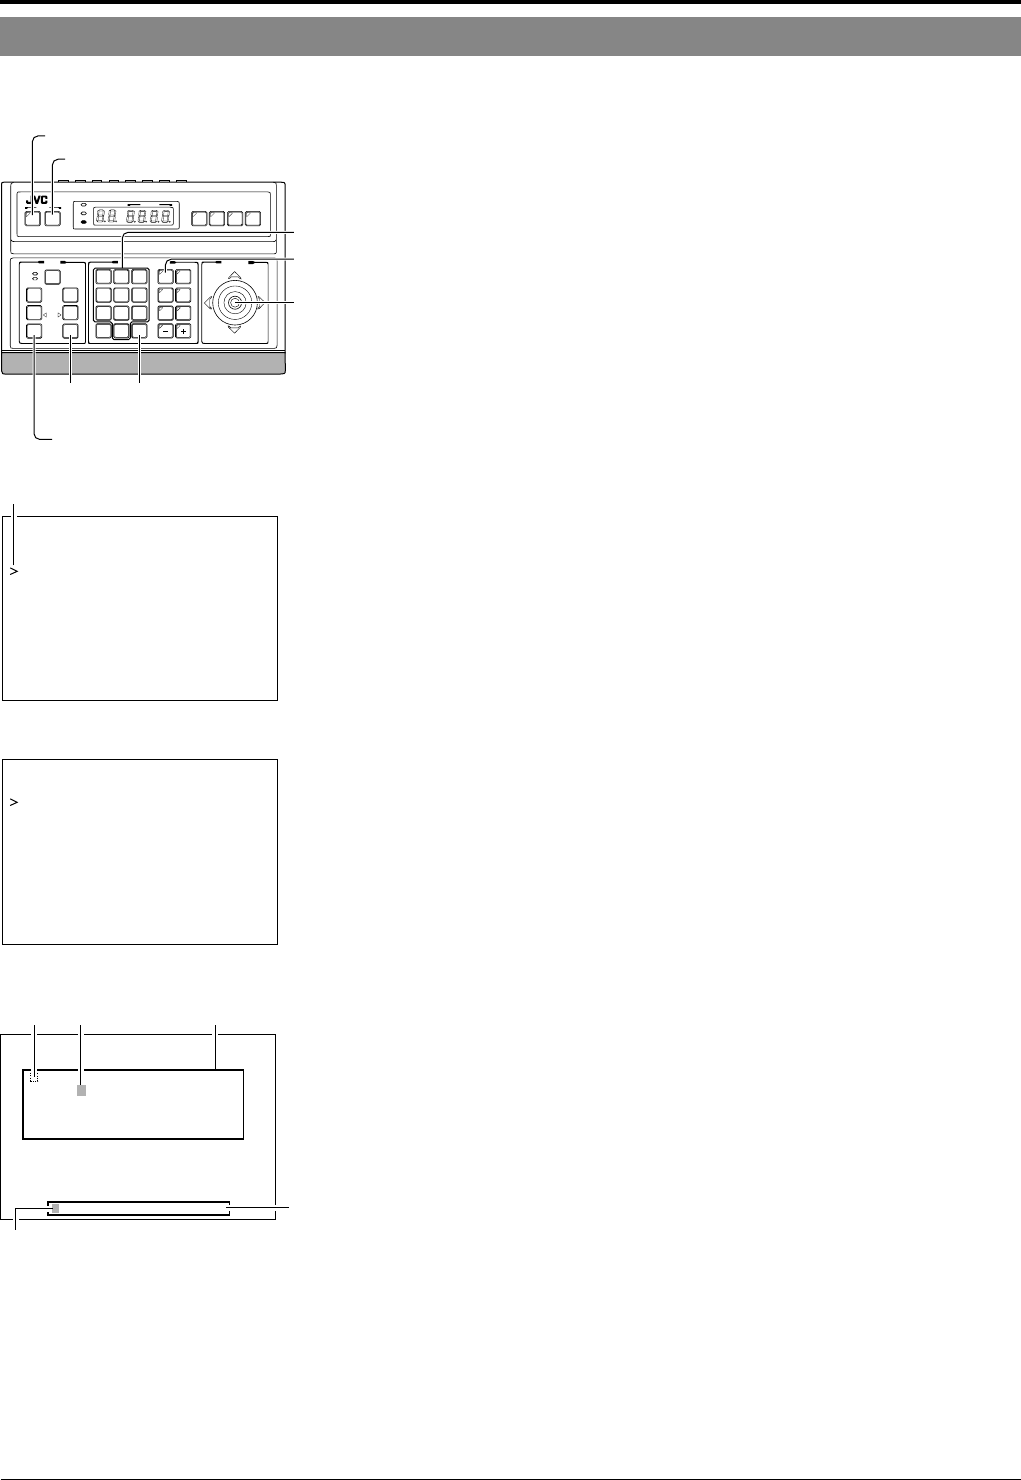
REMOTE CONTROL UNIT
RM-P2580
ALARM
POWER
KEY LOCK
PAN/TILT
lever
CAMERA
buttons
TELE
button
WIDE button
ENTER
button
Numeric keys
SET button
MENU button
CAM. FUNCT ION. .
–– – M E N U – ––
CAM. TITLE/ALARM. .
CAM. VIDEO ADJUST. .
CAM. ALC/ExDR. .
HOME MOTION DETECT . .
AUTO PAN/PATROL/TRACE. .
POSI .FUNCTION SET. .
FACTORY SETTINGS. .
Cursor
SETUP menu display on the camera
CAM.TITLE EDIT. .
–––CAMERA TITLE/ALARM
– ––
AREA TITLE OFF
AREA TITLE EDIT..
ALM.TITLE SIZE DOUBLE
ALM.TITLE COLOUR WHITE
ALARM TITLE EDIT. .
ALARM INPUT. .
ALARM OUTPUT. .
TITLE ALARM menu
0123456789ABCDEFGHIJK
–––CAMERA TITLE– ––
LMNOPQRSTUVWXYZ
abcdefg
hi jklmnopqrstuvwxyz., '
– :/ÄÖÜÂÊÎÔÛÇÑäëïöüâêîô
ûáéíóúàèìòùçñß¡¿
←
WIDE TELE
→
Character area
CAMERA TITLE screen
Title input
field
Blinking
Space Blinking
1.
Select the camera. (
☞
RM-P2580 Instruction manual)
CAMERA button → Numeric key (camera number) → ENTER button.
The picture of the selected camera is output.
2.
Display the SETUP menu on the camera.
(
☞
P. 18, steps
1
to
4
)
MENU button (3 sec.) → Select “CAMERA” with the PAN/TILT lever
→ SET button.
The camera moves to the home position.
3.
Tilt the PAN/TILT lever up or down to move the cur-
sor (>) to “CAMERA TITLE/ALARM” and press the
SET button.
The TITLE/ALARM menu is displayed.
4.
Ensure that the cursor (>) is located on “CAMERA
TITLE” and press the SET button.
• The CAMERA TITLE screen is displayed.
• The first characters in the character area and title input field blink
to indicate that the system is ready for title input.
5.
Tilt the PAN/TILT lever to select the first character
of the title from the character area.
• The character being selected blinks.
• The selected character is displayed in the title input field.
6.
Press the TELE button.
• The first character of the title is input, and the camera gets ready
for the input of the second character.
• If the WIDE button is pressed, the blinking position in the title in-
put field moves to the left. Use this facility to correct previously
input characters.
7.
Repeat steps
5
and
6
for each title character.
Complete the input of the title for the selected camera in this way.
8.
Press the MENU button.
• The screen returns to the previous menu.
• To set the titles for multiple cameras, repeat steps
1
to
7
for each
camera.


