


69
EN
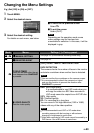
E.g.) Set [OIS] to [ON] or [OFF].
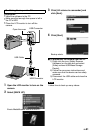
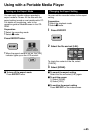
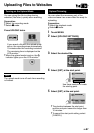
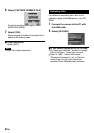
1 Touch MENU.
2 Select the desired menu.
3 Select the desired setting.
For details on each menu, see below.
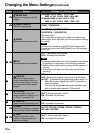
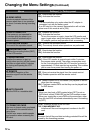
Changing the Menu Settings
Mode Menus Settings: [ ] = Factory-preset
! #
MANUAL SETTING
See page 33. (In the manual recording mode only)
!
REGISTER EVENT
See page 25.
#
z SELF-TIMER
Photo will be taken after the set
time elapses when SNAPSHOT
is pressed.
[OFF] / 2SEC / 10SEC / FACE DETECTION
FACE DETECTION
The camera checks the number of faces in the monitor
and starts countdown when another face is detected.
NOTE
•
You can confirm the countdown on the camera screen.
•
It is recommended to attach the camera to a tripod
and use this function to prevent the vibration after
SNAPSHOT is pressed.
!
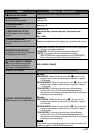
n VIDEO QUALITY
Sets the video quality.
UXP: Extra High quality
It is recommended to use UXP mode when you
will copy the video to a BD. Video recorded in
UXP mode cannot be copied to an AVCHD disc.
[XP]: High quality
SP: Standard quality
EP: For recording for a long time
You can record in full high-definition (1920 x 1080i)
videos with any of the video qualities.
NOTE
•
It is recommended to set UXP or XP mode when
recording scenes with fast moving or with extreme
changing in brightness to avoid noise.
•
Video data recorded in UXP mode cannot be saved by a
DVD burner. Use a BD burner to save them.
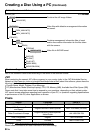
To return to the previous screen
Select
@
.
To quit the screen
Select [QUIT].
NOTE
Depending on the operation mode, some
menu settings may be fixed and are
unavailable for selection. In this case, it will be
displayed in gray.
FURTHER INFORMATION