


29
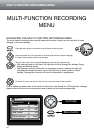
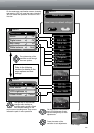
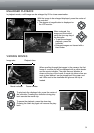
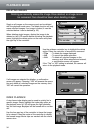
LCD MONITOR BRIGHTNESS
The brightness of the LCD monitor can be set in seven lev-
els. After selecting the LCD brightness option on the multi-
function recording menu (p. 24), the LCD brightness screen
will be displayed. Use the left/right key of the controller to
adjust the brightness level; the live image will change
accordingly. To set the level, press the center of the con-
troller.The LCD brightness level will affect all modes.
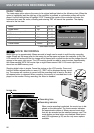
COLOUR MODE
The colour mode controls whether the recorded image will be colour or black and white.This must be
set before the image is recorded; the live image on the monitor will reflect the selected colour mode.
When using the viewfinder, take care to reset the colour mode after taking monochrome images; the
B&W icon will be displayed on the data panel when the black and white setting is active.
The colour mode has no effect on image file size.The colour mode is set on the multi-
function recording menu (p. 24).
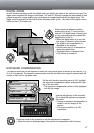
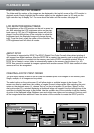
SPOT METERING
The spot meter is turned on with the multi-function recording menu (p. 24). Usually the camera
employs center-weighted metering, which averages the light values of the entire scene with emphasis
on the central area of the image. Spot metering uses a smaller area within the image to calculate the
exposure.This metering mode is less influenced by extremely bright or dark areas at the edge of the
scene.
LCD brightness
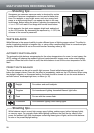
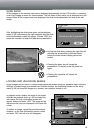
SLOW SHUTTER
The shutter control range is between 1/2000 and 1/8 second.With the flash mode set to flash cancel
(p. 19) or when using one of the subject programs (p. 20), turning the slow-shutter function on with
the multi-function recording menu (p. 24), extends the shutter control range: 1/2000 to 2 seconds.
The extended shutter-speed range of the slow-shutter function allows greater detail to be recorded in
very dark conditions. However, because of longer shutter speeds, the camera should be mounted on
a tripod to ensure sharp pictures.