83
Using ViewNX 2
Playback Features
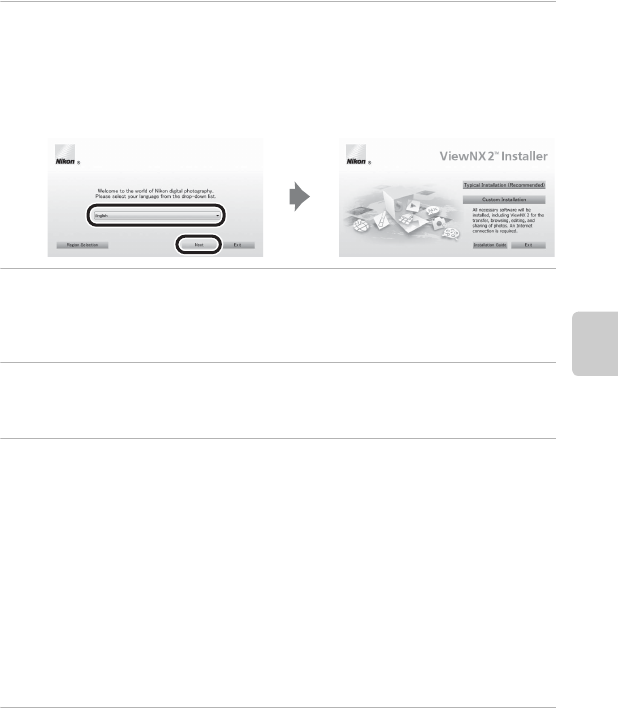
2 Select a language in the language selection dialog to open the
installation window.
• If the desired language is not available, click Region Selection to choose a different
region and then choose the desired language (the Region Selection button is not
available in the European release).
• Click Next to display the installation window.
3 Start the installer.
• We recommend clicking Installation Guide in the installation window to check the
installation help information and system requirements before installing ViewNX 2.
• Click Typical Installation (Recommended) in the installation window.
4 Download the software.
• When the Software Download screen is displayed, click I agree - Begin download.
• Follow the on-screen instructions to install the software.
5 Exit the installer when the installation completion screen is displayed.
• Windows: Click Yes.
• Mac OS: Click OK.
The following software is installed:
• ViewNX 2 (consisting of the three modules below)
- Nikon Transfer 2: For transferring images to the computer
- ViewNX 2: For viewing, editing, and printing transferred images
- Nikon Movie Editor: For basic editing of transferred movies
• Panorama Maker 6 (for creating a single panorama image of a landscape, etc. from a
series of images that each capture a separate portion of the subject)
• QuickTime (Windows only)
6 Remove the ViewNX 2 Installer CD-ROM from the CD-ROM drive.


