MemoryFrame User’s Manual
Copyright© 2002 Pacific Digital Corporation Page 27
7. Connecting a Camera to the MemoryFrame
For those who wish to bypass their PC, MemoryFrame can also be
connected directly to USB digital cameras that support the USB Mass
Storage Specification (see Chapter 12). In this mode, the Photos stored
in the camera must be in JPEG format (not TIF or other camera formats).
In this mode, independent of a PC, MemoryFrame is capable of
downloading JPEG formatted pictures, changing the resolution of the
pictures to match that of the MemoryFrame display, storing the pictures
in nonvolatile memory, and displaying the downloaded pictures with user
specified durations and transitions.
Important! To transfer slideshows from the Camera directly to your
MemoryFrame, you first need to prepare your MemoryFrame for
communicating, as described in the section below.
Preparing MemoryFrame to Communicate to Camera
The MemoryFrame is a single function device; this means that it cannot
be managed or communicate with a camera while it is displaying a slide
show. In all cases, you must stop the slideshow by pressing the Menu
Button. This will place the MemoryFrame in the Menu System mode
that is required to communicate with the Camera.
Important! Make sure that the camera’s memory-card is already
inserted into the camera before connecting the USB cable.
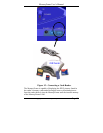
Next, connect the MemoryFrame directly to the USB digital camera
using the USB cable that was provided by the camera manufacturer (i.e.
the cable that came with your camera).
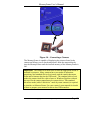
To use a camera, connect the “micro-USB” connector to the camera’s
USB port. Then connect the “Standard USB” connector to the “Camera”
connector of the MemoryFrame. See Figure 14.


