


35
PreparationShooting
The images shot from when shooting starts •
until it is stopped are recorded as one clip.
When recording is paused after a short period, •
a small amount of time may be required after
pressing the START/STOP button to stop
recording before writing to the SD Memory
Card is terminated.
This means that operations cannot be
accepted if the START/STOP button is
pressed immediately.
The camera will read information from the SD •
Memory Card immediately after the card is
inserted. Press the START/STOP button to
begin recording after PAUSE is displayed in
the operation status display. (Page 47 of Vol.2)
The camera’s factory default setting is PH •
mode 1080/60i recording.
(To view current setting status: Page 6 of
Vol.2)
The upper limit for the number of clips which •
can be recorded on a single SD Memory Card
is 900. (However, this number may exceed
900 clips at times such as when shooting
immediately after the POWER switch has been
set to ON.)
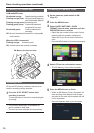
Checking photos taken (REC CHECK)
When recording is paused, the REC CHECK
function can be used to review the video and audio
recorded 2 seconds immediately prior. You can
assign the REC CHECK function to USER switch
1/2/3 via the menu.
The REC CHECK images are also recorded •
when a device is connected to the camera and
backup images have been recorded.
The REC CHECK function does not work when •
PC has been selected as the operation mode.
This function does not work if the REC format is •
changed, if the camera is set to the CAM mode
after having been switched to the PB mode, if the
SD memory card slot cover is opened, or if the
slot is switched after shooting.
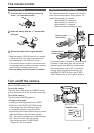
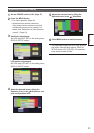
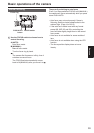
Preparing for recording
1
Turn the POWER switch to ON.
(Page 27)
Make sure the mode lamp is lit up. •
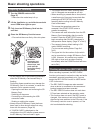
2
Lift the viewfinder up, and slide the card slot
cover OPEN lever right to open.
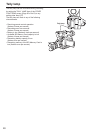
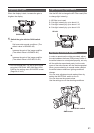
3
Fully insert an SD Memory Card into the
card slot.
4
Close the SD Memory Card slot cover.
Ensure that the cover firmly clicks into place.•
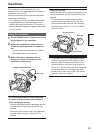
Insert the
connector part
in the direction
shown here, and
push until the
card clicks firmly
into place.
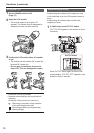
3
Do not perform any of the following operations •
while the SD Memory Card access lamp is
flashing.
Performing these operations may damage the
SD Memory Card or its contents, or cause the
camera to fail to operate correctly.
Opening the card door and removing the SD ā
Memory Card
Switching off the power ā
Connecting or disconnecting the USB ā
connection cable
Shaking or striking the camera ā
Always format SD Memory Cards that have •
been used in other devices when first using
them with this camera. (Page 36)
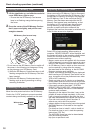
If “CHECK CARD” is displayed on the •
viewfinder or the LCD monitor, please remove
the SD Memory Card and insert it again.
Basic shooting operations