


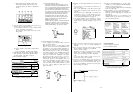
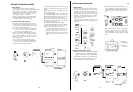
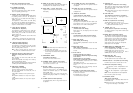
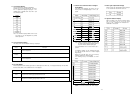
DATE/TIME
DISPLAY
DISPLAY
.
The
date/time
is
displayed
and can be recorded
together
with
the
colour
bar
signal
by setting the
Colour
Bar/Night
Eye/Camera
Selection
Switch to the
BAR position.
.
Menu,
calender,
date and camera
identificaion
are
not
displayed
on
the
screen
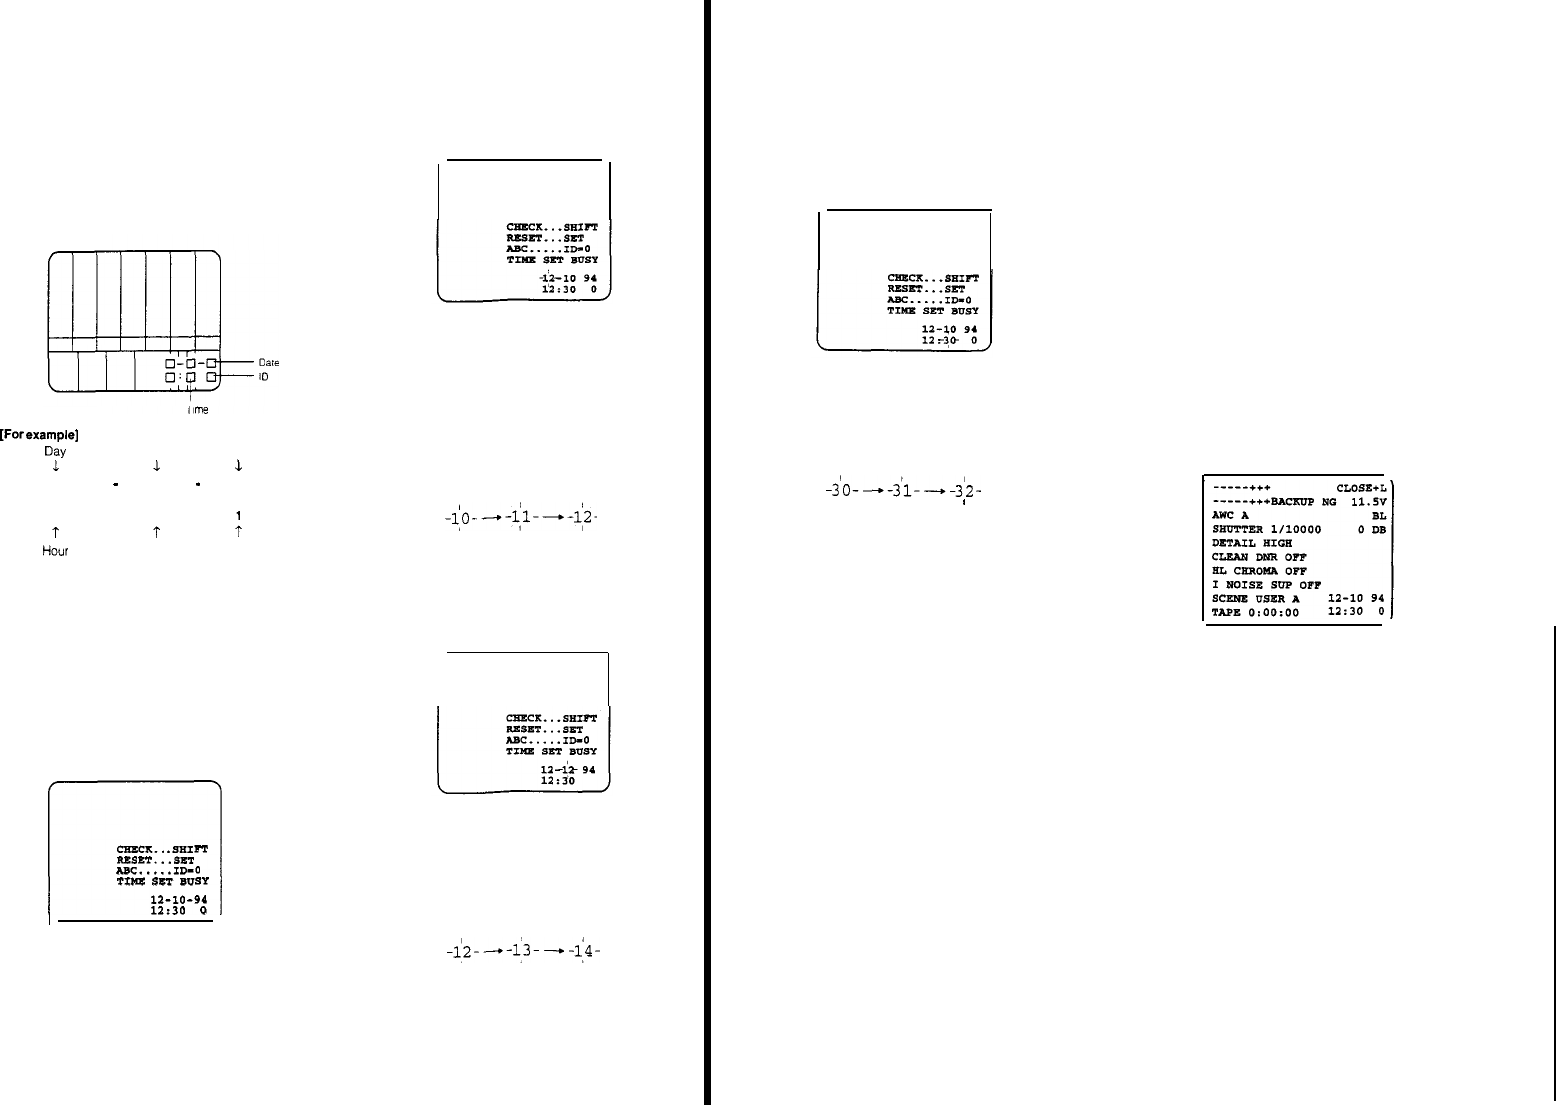
DISPLAY POSITION
Month
Year
12 10 94
12
:
30
Minute
ID
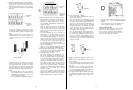
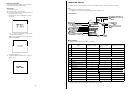
DATE/TIME
SETTING
PROCEDURE
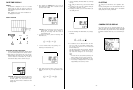
1
Set the Colour
Bar/Night
Eye/Camera
Selection
Switch
(27)
to
the the BAR
position
to
show
the date and time
2
While
pressing
the Check Button
(25),
press the Auto
White/Auto
Black Set Switch (6)
to
the AWC
position
and then
release
the Check Button (25) in o
rder
to
shift to
the
time
setting
mode as
shown in
the figure
3. After
releasing
the Check Button (25), press the
Check
Button
once
again
within
10 seconds
to
cause
the
‘Date’
section
to
blink
CAUTION:
If
the
Check Button (25) has not
been
pressed
within
10 seconds and no character is
blinking,
the time setting mode will be
reset
to
normal
dlsplay
mode
4. To in
crease
the ‘Month',
press
the Recording
Tlme
Reset
Button (21)
5. For fast i
ncrement
mode,
keep
pressing
the
Recording Time
Reset
Button
(21).
6. After
setting
the correct ‘Month’, press the Check
Button
(25)
to
set the
‘Day’,
The
‘Day’
characters
start
to
blink
CAUTION:
Release
the Check Button (25)
after
press-
i
ng
the Auto
White/Auto
Black Set Switch (6)
to
the AWC
position.
If
the Check Button is kept
pressed, the camera will not be
shifted
to
the
time
setting
mode
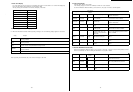
- 74 -
7. P
ress the
Recording
Time
Reset
Button
(21)
to
change
the
‘Day’
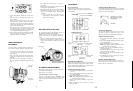
ID SETTING
8.
After setting the
correct
‘Day’,
press the Check Button
(25).
9.
For
setting the
‘Year’
and
‘Hour’,
follow
the
same
pro-
cedure
used
for the ‘Month’ or
‘Day’
10.
For Setting
the
‘Minute’,
press the Check
Button
(25)
after
setting
the
‘Hour’
The setting of 0-9 and
blank
at the ID
position is
avali-
able
By
each
pressing
down
of the Auto
Black/Auto
White
Set
Switch
(6)
toward
the ABC
position
when in the
data/time
Setting
mode,
the ID setting is
advanced.
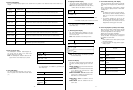
CAMERA STATUS DISPLAY
The camera status can be recorded
together
wih
the
colour
bar
signal
and the
Date/Time
character by
keeping
the Check Button (25) pressed
while
the Colour
Bar/Night
11. Press the
Recording
Time
Reset
Button
(21) to
change
Eye/Camera
Selection
Switch (27) is set
to
the BAR posi-
the
‘Minute’
tion
12. If it is
desired
to
set the
‘Second’'
w
ait
for the
Time
tone from
a
radio,
etc, (the
‘Minute’
section is
blink-
ing).
As
soon
as the tone at the Time is heard, press
the
Check
Button
(25)
The
clock
starts
running
and
the
character ‘TIME SET
END’ will be
displayed
for 1
second
and then the
dis-
play
mode will be
changed
to
the normal display
mode.
Notes:
1
The date and
time
(clock)
will
be powered by the
back-up
battery
even
if the camera
is
tumed
off.
2
The
back-up
battery
lasts
approxlmately
10
years
3
The
accuracy
of
displayed
date and
Time
(clock)
is
approximately
+60
seconds per month
- 75 -