


Preparation
30
VQT0X92
• To reset the folder number to 100, format
(P111) the card first and then use this
function to reset the file number.
A reset screen for the folder number will
then appear. Select [YES] to reset the
folder number.
• Refer to P113 for detailed information
about the file number and the folder
number.
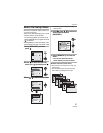
[RESET]
Press [ ] to display the [SETUP] menu
and select this item. (P27)
The [REC], [CUST. SET MEM.] or [SETUP]
menu settings are reset to the initial
settings.
• The birthday setting for [BABY1]/[BABY2]
(P69) in scene mode, the number of days
that have passed since the departure date
for [TRAVEL DATE] (P71) and the
[WORLD TIME] setting (P73) are also
reset when the [SETUP] menu settings
are reset. Also, [FAVORITE] (P103) is
fixed to [OFF] and [ROTATE DISP.] (P104)
is fixed to [ON].
• The folder number and the clock setting
are not changed.
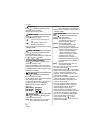
[USB MODE]
Press [ ] to display the [SETUP] menu
and select this item. (P27)
Select the USB communication system
after or before connecting the camera to
your PC or your printer with the USB
connection cable (supplied).
[ SELECT ON CONNECTION]:
Select either [PC] or [PictBridge (PTP)]
if you connected the camera to a PC or
a printer supporting PictBridge.
[PC]:
Set after or before connecting to a PC.
[ PictBridge (PTP)]:
Set after or before connecting to a
printer supporting PictBridge.
• When [PC] is selected, the camera is
connected via the “USB Mass Storage”
communication system.
• When [PictBridge (PTP)] is selected, the
camera is connected via the “PTP (Picture
Transfer Protocol)” communication system.
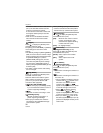
[HIGHLIGHT]
Press [ ] to display the [SETUP] menu
and select this item. (P27)
[ON]: When the auto review or review
function is activated, a white
saturated area appears blinking
in black and white. (P44)
[OFF]: No highlight display
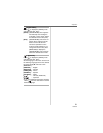
[VIDEO OUT]
(Playback mode only) (P118)
Press [ ] to display the [SETUP] menu
and select this item. (P27)
[NTSC]: Video output is set to NTSC
system.
[PAL]: Video output is set to PAL
system.
[TV ASPECT]
(Playback mode only)
Press [ ] to display the [SETUP] menu
and select this item. (P27)
[ ]:
Select this if connecting the camera to a
16:9 TV.
[]:
Select this if connecting the camera to a
4:3 screen TV.
• This is suitable for displaying pictures
recorded with a [ ] aspect on the
full screen of a 16:9 TV. Pictures
recorded with a [ ] or [ ]
aspect are displayed with black bands
on the left and right of the screen.
• When [ ] is selected, pictures
recorded with a [ ] or [ ]
aspect are displayed with black bands
on the top and bottom of the screen.
• When you select [ ] and use the
AV cable (supplied) for output (P118),
pictures are displayed vertically on the
LCD monitor.
SET
MENU
SET
MENU
SET
MENU
SET
MENU
SET
MENU