Menu Settings
84
VQT0X92
w Auto white balance
The available white balance range is shown
in the following illustration. When you take
a picture beyond the available white
balance range, the picture may appear
reddish or bluish. Even when you take a
picture inside the range shown in the
illustration, auto white balance may not
operate properly if there are many light
sources or there is no color close to white.
In these cases, set the white balance to a
mode other than [AUTO].
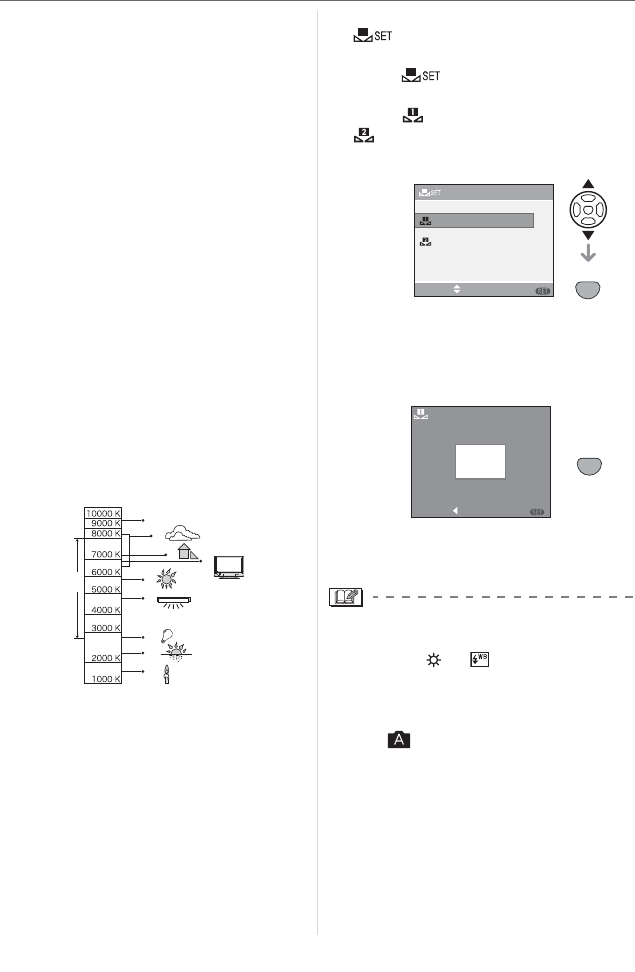
1 Auto white balance will work in the
following range.
2 Blue sky
3 Cloudy sky (Rain)
4 Shade
5 TV screen
6 Sunlight
7 White fluorescent light
8 Incandescent light bulb
9 Sunrise and sunset
10Candlelight
KNKelvin Color Temperature
w Setting the white balance manually
[]
Use this to set the white balance manually.
1 Select [ ] and then press
[MENU/SET].
2 Select [ WHITE SET 1] or
[ WHITE SET 2] and then press
[MENU/SET].
3 Aim the camera at a sheet of white paper
etc. so that the frame in the center is
filled by the white object only and then
press [MENU/SET].
4
Press [MENU/SET] twice to close the menu.
• You can also press the shutter button
halfway to finish.
• When you take a picture with the flash, the
white balance is automatically adjusted
(except for [ ] /[ ]). However, the
white balance may not be properly
adjusted if the flash level is insufficient.
• The white balance cannot be set in auto
mode [ ] and scene mode.
1)
2)
3)
4)
5)
6)
7)
8)
9)
10)
WHITE SET
SET
MENU
WHITE SET 2
SELECT
WHITE SET 1
SET
MENU
WHITE SET
SETCANCEL
MENU
SET
MENU


