28
LSQT1190
Setup
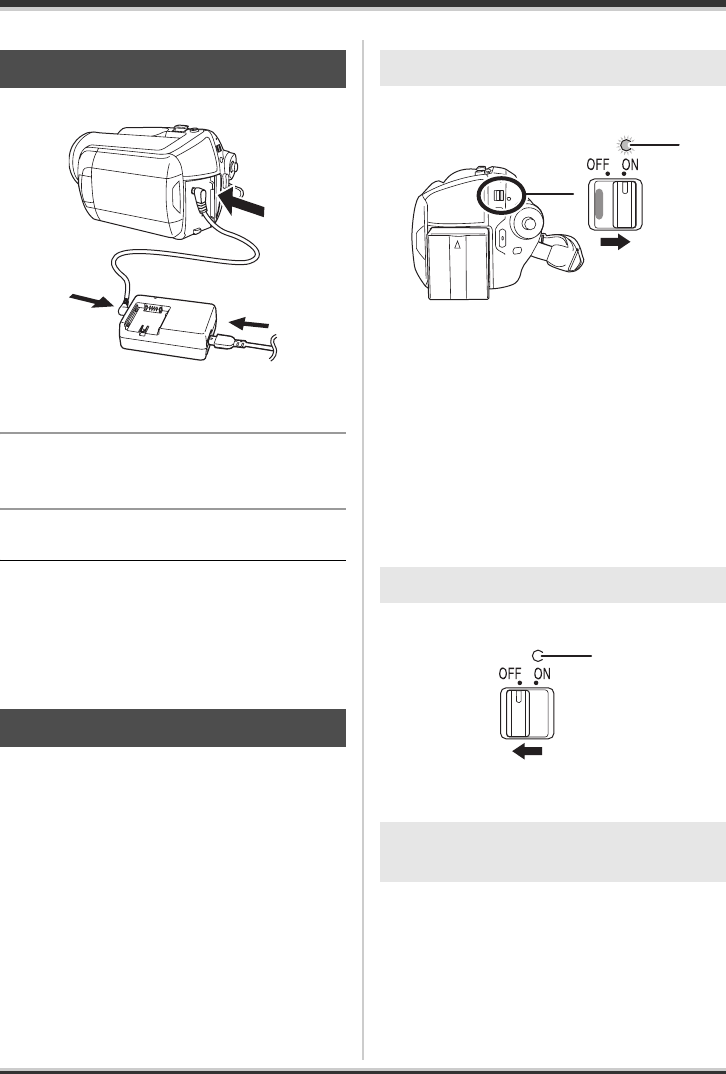
1 Connect the AC cable to the AC
adaptor and the AC outlet.
2 Connect the DC cable to the AC
adaptor.
3 Connect the DC cable to this unit.
≥ Do not use the AC cable with any other
equipment as it is designed only for this unit.
Do not use the AC cable from other equipment
with this unit.
≥ While the DC cable is connected to the AC
adaptor, the battery will not be charged.
≥ (SDR-H200) When recording, open the lens
cover before turning the unit on. (l 18) If the
unit is turned on with the lens cover closed, the
automatic white balance adjustment (l 121)
may not function properly.
≥ (SDR-H20/SDR-H18) When recording, remove
the lens cap before turning the unit on.
If the unit is turned on with the lens cap
attached, the automatic white balance
adjustment (l 121) may not function properly.
Set the OFF/ON switch to ON.
The status indicator A lights and the power turns
on.
≥ When the unit is turned on for the first time, a
message asking you to set the date and time
will appear. Select [YES] and set the date and
time. (l 36)
≥ When the unit is turned on for the first time, a
selection screen will appear to select the
recording destination for motion pictures and
still pictures.
Select [HDD] or [SD CARD] for each type of
picture and then press the joystick.
Set the OFF/ON switch to OFF.
The status indicator A goes off when the power
turns off.
When the OFF/ON switch is set to ON, the power
can be turned on and off with the LCD monitor
when the unit is in video recording mode or
picture recording mode.
Connecting to the AC outlet
Turning the unit on/off
How to turn on the power
How to turn off the power
How to turn the power on and off
with the LCD monitor
A
A
LSQT1190(ENG).book 28 ページ 2007年1月13日 土曜日 午後3時32分


