


C611M-C (3/06) 19
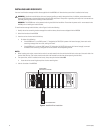
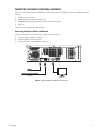
POWERING ON THE NVR300
After the hard disk drives have been installed and the necessary connections have been made to the NVR300, power can be applied to the unit.
To power on the NVR300, do the following:
1. Turn on the attached monitor.
2. On the rear panel of the NVR300, set the power supply ON/OFF switch to the ON position.
3. On the front panel of the NVR300, press the POWER button to power on the unit.
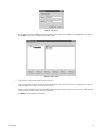
The NVR300 boots. During the boot process, the NVR300 splash screen appears, followed by the recovery boot option screen and the
Windows XP boot screens. The Windows XP log-in screen then appears.
NOTES:
• The recovery boot option screen is used to recover the system drive if the operating software or the NVR300 software is corrupted.
The screen times out after 30 seconds.
• The NVR300 software is a service. If the NVR300 is unable to boot correctly the first time, the NVR300 system automatically restarts the
service. If the NVR300 service fails to start again, the system initiates a hard reboot. If the service fails to start after the hard reboot, a
message indicating that the NVR300 service failed to start is sent by the Messenger service of Windows XP to client PCs and to VMX300
systems connected to the NVR300. In order to receive the message, the Messenger service on the client PCs and on the VMX300 systems
must be running (default setting is Automatic).
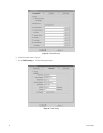
• To log in to Windows XP as NVR300, click NVR300. The Windows XP desktop then appears.
POWERING OFF THE NVR300
The NVR300 is designed to run continuously; however, if you need to power off the NVR300, do the following:
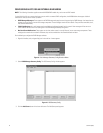
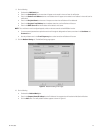
1. On the Windows XP taskbar, click the Start button, and then click Turn Off Computer.
The “Turn off computer” dialog box appears.
2. Click the Turn Off button.
The NVR300 powers off.
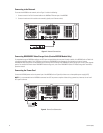
NETWORK SETTINGS CONFIGURATION
Configuration of network settings for the NVR300 involves the following tasks:
• Identifying the NVR300 on the network
• Configuring TCP/IP settings
In order to perform the above tasks, you must know the following:
• Unique computer name to be assigned to the NVR300
• Unique IP address of the NVR300 if the IP address is not to be assigned automatically
• Subnet mask address
• Default gateway address, if applicable
• Workgroup name if the NVR300 is to be part of a workgroup
• Domain name if the NVR300 is to be part of a domain in addition to the associated user name and password that allow you to assign the
NVR300 to a domain
• Preferred DNS and alternate DNS server addresses, if applicable
To obtain the above information, contact your network administrator. After you have obtained the information, you can set up the NVR300 on the
network. For detailed instructions to set up the NVR300 on the network, refer to the sections that follow.