


C611M-C (3/06) 41
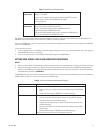
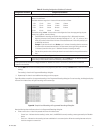
Table E. Recording Configuration Guidelines (Continued)
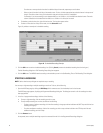
4. Click the OK button to start the recording based on the programmed parameters. (Clicking the Cancel button prevents the recording from
starting.)
The recording is listed in the Programmed Recordings dialog box.
5. Repeat steps 2-4 above for each additional recording you wish to program.
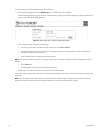
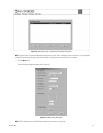
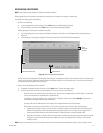
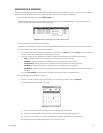
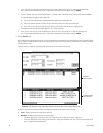
Figure 28 provides a sample list of programmed recordings in the Programmed Recordings dialog box. For each recording, the dialog box displays
the name of the video source, the type of recording, and the stream type.
Figure 28. Sample List of Recordings in Programmed Recordings Dialog Box
Note the following about the Source column in the Programmed Recordings dialog box:
• Either a camera icon or a clock icon precedes the name of the video source:
– Camera icon—Indicates that the recording is active; that is, the NVR300 is currently recording a stream generated by the PelcoNet
device.
– Clock icon—Indicates that the recording has been scheduled but is not currently active. When the recording becomes active, the
clock icon changes to a camera icon.
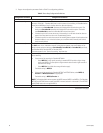
Configuration Parameter Configuration Guidelines
Event recording (continued)
Post-Alarm time If event recording is enabled, select the desired minimum amount of time of recording after the occur-
rence of an alarm event.
Available selections range from 1 minute to 24 hours and are as follows:
1 min 15 min 1 hour 5 hours 15 hours
3 min 25 min 2 hours 6 hours 20 hours
5 min 30 min 3 hours 10 hours 24 hours
10 min 45 min 4 hours 12 hours
The default setting is 0 sec. You must select a value higher than 0 sec when programming the post-
alarm time. In addition, note the following:
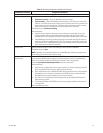
• The NVR300 writes recordings to hard disk drive storage as files in 180-second increments
beginning at the top of each minute (for example, files begin at 7:15, 7:16, 7:17, and so on). As a
result, the pre-alarm time will be a minimum of the selected amount of time with possibly up to
an additional one minute.
Example: If post-alarm time is set to 10 min, up to 11 minutes of recording after the occurrence
of an alarm event are saved automatically. If the alarm event occurs again during the maximum
11 minutes of post-alarm time, up to 11 additional minutes of recording are saved.
• The sum of the pre-alarm time and the post-alarm time must be less than the specified retention
time.
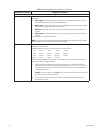
Recording scheduler
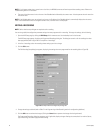
Time If you wish to schedule the recording on a weekly basis, click the Time button. For detailed information
about setting a time schedule, refer to the Scheduling a Recording section.
*Clicking the check box functions as a toggle and selects or deselects the function. The function is selected when a checkmark
appears in the check box.