


20 C611M-C (3/06)
IDENTIFYING THE NVR300 ON THE NETWORK
To identify the NVR300 on the network, do the following:
1. Log in to Windows XP as a user by clicking the NVR300 icon.
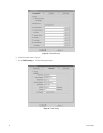
2. Click the NVR300 Platform Admin icon to call up the NVR300 Platform Administrator screen.
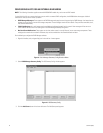
3. On the NVR300 Platform Administrator screen, click the Network Settings button.
4. Make the necessary network changes. The Computer Name Changes dialog box appears.
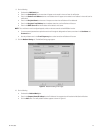
5. In the “Computer name” text entry box, replace the default name with the desired new name.
6. Assign the NVR300 to be a member of a workgroup or a domain.
To assign the NVR300 to a workgroup, do the following:
a. Click Change on the Computer Name tab.
b. Replace the default name, WORKGROUP, in the Workgroup box with the appropriate name of the workgroup the NVR300 is to join.
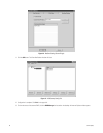
c. Click the OK button. The Computer Name Changes information dialog box appears with a welcome message indicating the NVR300
has been assigned to the workgroup.
d. Click the OK button. The Computer Name Changes information dialog box appears stating that you must restart the NVR300 for the
changes to take effect. Proceed to step 7.
To assign the NVR300 to a domain, do the following:
a. Click the Domain option and then enter the domain name.
b. Click the OK button. The Domain Username and Password dialog box appears asking you to enter a user name and password.
c. Enter the user name and password and then click the OK button. The Computer Name Changes information dialog box appears with a
welcome message indicating that the NVR300 has been assigned to the domain.
d. Click the OK button. The Computer Name Changes information dialog box appears stating that you must restart the NVR300 for the
changes to take effect. Proceed to step 7.
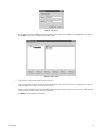
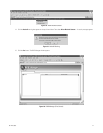
7. Click the OK button. The System Properties dialog box appears showing the new computer name and workgroup or domain name of the
NVR300.
8. Click the OK button. The System Settings Change dialog box appears asking you whether you want to restart the NVR300.
9. Click the Yes button. The NVR300 boots. During the boot process, the NVR300 splash screen appears, followed by the recovery boot option
screen and the Windows XP boot screens. The Windows XP log-in screen then appears.
You can now proceed to the next section to configure TCP/IP settings.