5-5
E
5-4
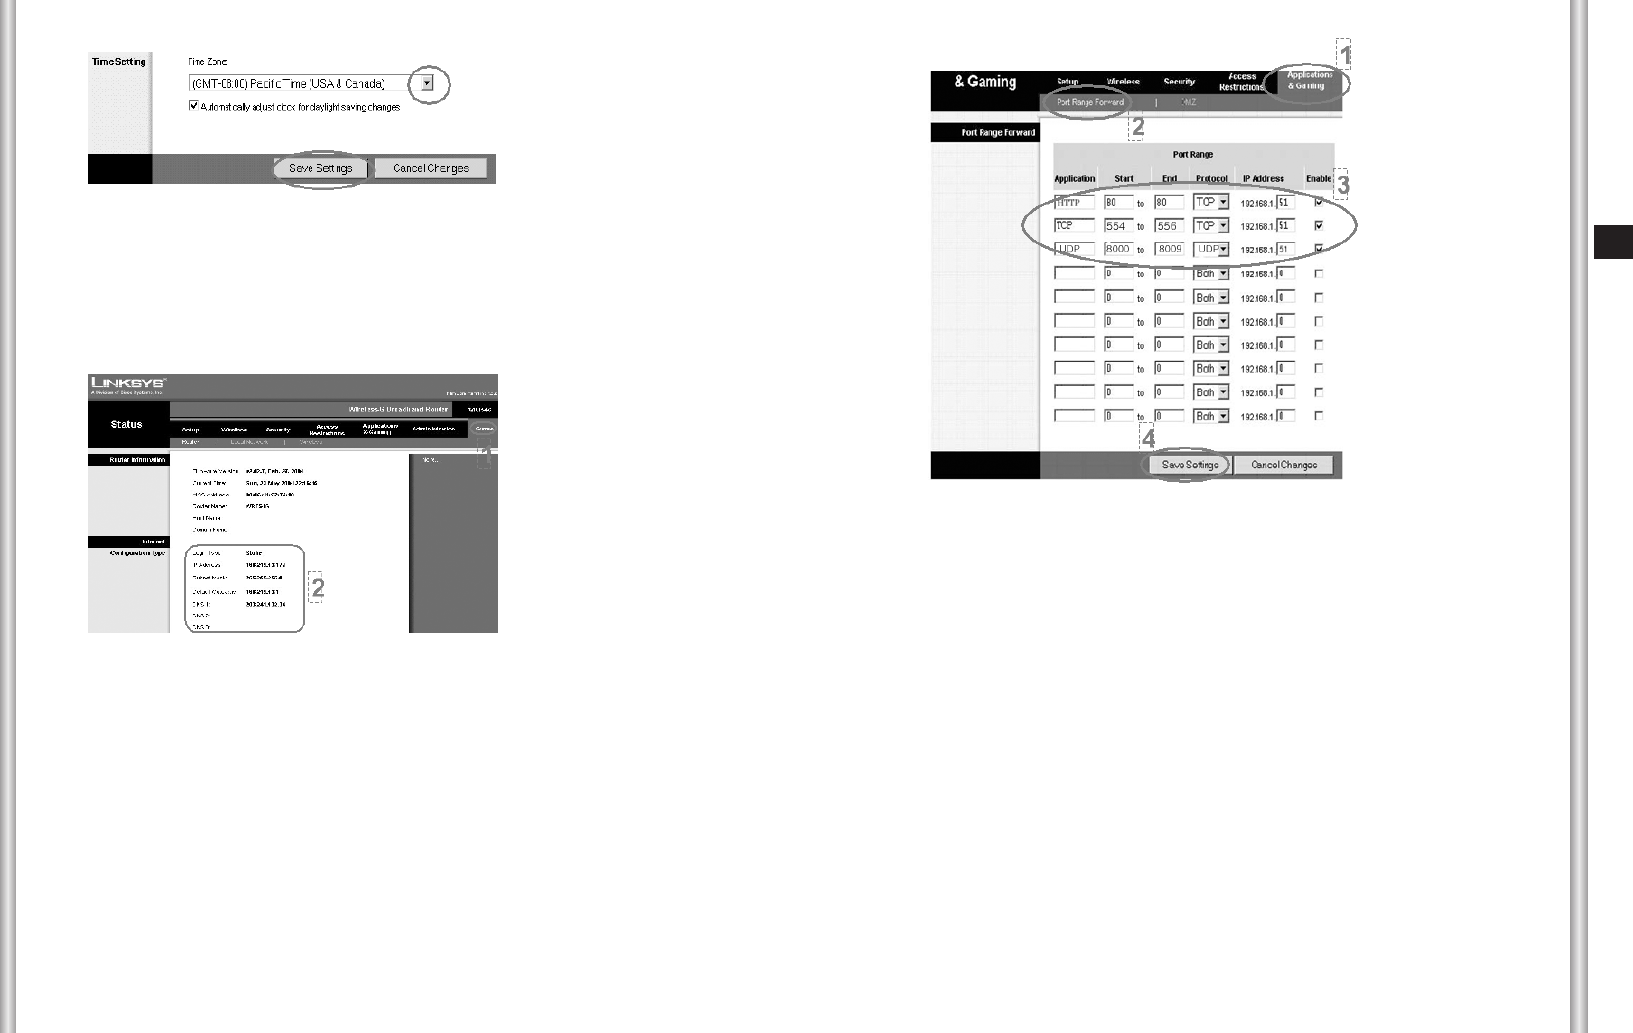
3. Set the Time zone
1. Select the “Time Zone”.
2. Press the “Save Settings”.
4. Verify the Connection state.
The way to verify the setting state is as follows.
1. Press the “Status”.
2. Verify the data below Internet Configuration Type.
3. In case of using Cable or ADSL:
Press the “Connect” button if the login is "Disconnected". If fail
again, retry from Step1 (Connection).
4. Remember the IP/Subnet mask/Gateway of connection, and it will be
helpful to install SCC-C6475(P) afterwards.
5. Port Forwarding (Be sure to read this.)
1. Click the “Applications and Gaming”.
2. Click the “Port Range Forward”.
3. Port forwarding
➀ First line: Application: Enter HTTP
Start and End: Enter 80 both
Protocol: Select TCP
IP Address: 192.168.1.2 ~ 255
Enable: Select
➁ Second line: Application: Enter TCP
Start: Enter 554 (RTSP Port)
555 (TCP Streaming Port)
End: Enter 556 (Upload Server Port)
Protocol: Select the “TCP”.
IP Address: The same IP with HTTP
Enable: Select
➂ Third line: Application: Enter UDP
Start: Enter 8000
End: Enter 8009
Protocol: Select UDP
IP Address: Enter the same IP with HTTP/TCP
Enable: Select
WW
WW
aa
aa
rr
rr
nn
nn
ii
ii
nn
nn
gg
gg Be sure to memorize the above setting value to use the
SCC-C6475(P) setting.
4. Press the “Save Settings”.
5. Close the Internet browser.


