


81
Performing with a computer
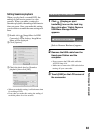
• When you play back a created DVD, the ending
of each movie pauses for a few seconds. However,
when you make the Seamless playback setting
with ImageMixer Menu, the ending of each movie
does not pause. Before connecting the camcorder
to a computer via USB, refer to “Setting Seamless
playback”(p.83).
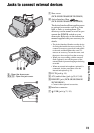
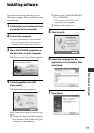
1 Confirm that the Handycam
Station is not connected to a
computer.
2 Turn on the computer.
• Close all applications running on the
computer.
3 Place the recordable DVD to be
saved on the disc drive of your
computer.
• It is recommended that you use a new
recordable DVD.
• If any software starts on the computer
automatically, close it.
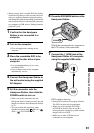
4 Connect the Handycam Station to
the wall socket using the supplied
AC Adaptor.
5 Set the camcorder onto the
Handycam Station, then slide the
POWER switch to turn on.
• When you set the camcorder onto the
Handycam Station, connect securely onto the
interface connector of the Handycam Station
(p.73).
• You can perform this operation, when
whichever position of the (Movie) /
(Still) / (PLAY/EDIT) is lit.
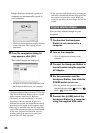
6 Press the DVD BURN button on the
Handycam Station.
[Check the connected device.] appears on
the LCD screen of the camcorder.
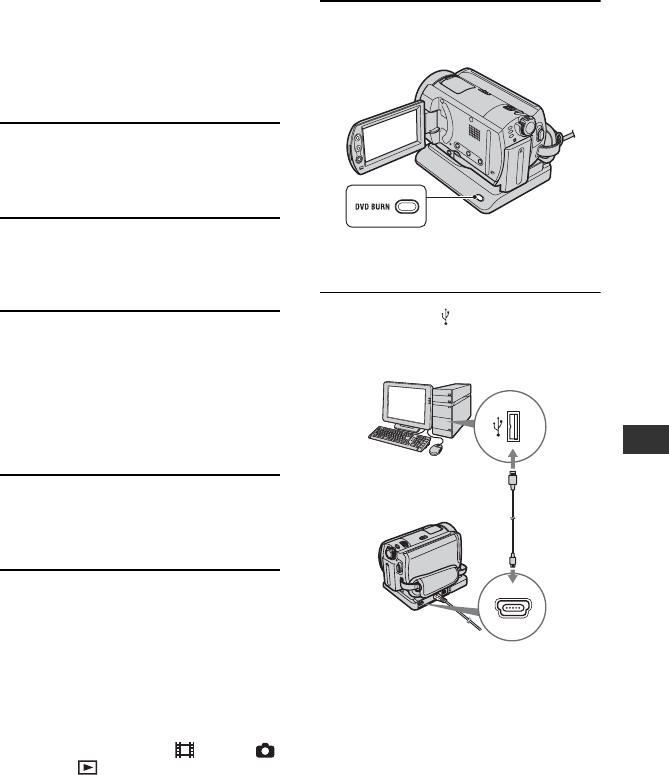
7 Connect the (USB) jack of the
Handycam Station to a computer
using the supplied USB cable.
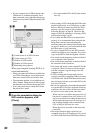
DVD creation starts up.
• During DVD creation, do not apply vibration.
The DVD creation may be terminated.
• When you insert a burned DVD-RW/
DVD+RW in the disc drive in step 3, a
message appears, asking if you want to delete
images saved on a DVD.
• Make sure no other USB devices are
connected to your computer.