


95
Performing with a computer
You can save images in a Playlist on the
camcorder to a DVD.
• For creating a Playlist, refer to page 63.
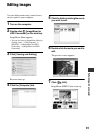
1 Confirm that the Handycam
Station is not connected to a
computer.
2 Turn on the computer.
• Close all applications running on the
computer.
3 Place the recordable DVD on the
disc drive.
• It is recommended that you use a new
recordable DVD.
• If any software starts on the computer
automatically, close it.
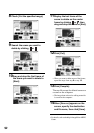
4 Connect the Handycam Station to
the wall socket using the supplied
AC Adaptor.
5 Set the camcorder onto the
Handycam Station, then slide the
POWER switch to turn on.
• You can perform this operation, when
whichever position of the (Movie) /
(Still) / (PLAY/EDIT) is lit.
6 Connect the (USB) jack of the
Handycam Station to a computer
using the supplied USB cable.
[USB SELECT] appears on the LCD
screen of the camcorder.
• For connecting with the USB cable, see
page 81.
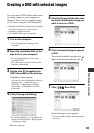
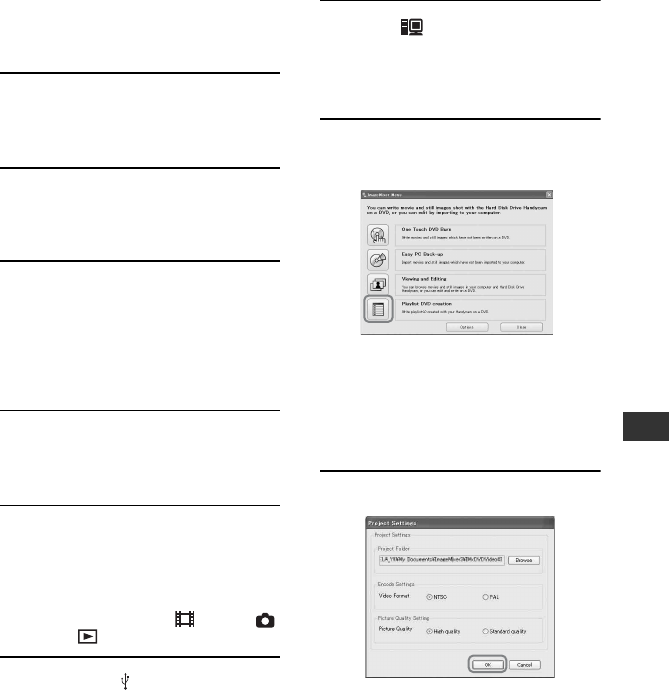
7 Touch [ HDD] on the LCD
screen of the camcorder.
ImageMixer Menu appears on the screen
of the computer.
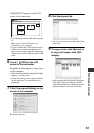
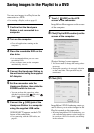
8 Click [Playlist DVD creation] on the
screen of the computer.
[Project Settings] screen appears.
• You do not need to change the setting unless
necessary.
• During the operation, do not apply vibration
on the camcorder. The operation may be
terminated.
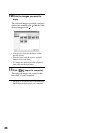
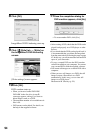
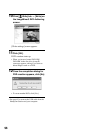
9 Click [OK].
ImageMixer3 DVD Authoring starts up,
and it allows you to select images in the
Playlist created on the camcorder.
• By using ImageMixer3 DVD Authoring, you
can create the index menu or select images to
be saved on a DVD. For details, see the help
in the software.
Saving images in the Playlist to a DVD