


10
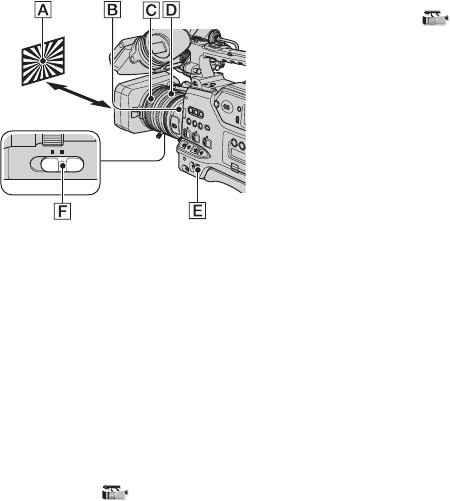
Adjusting the flange focal length
automatically
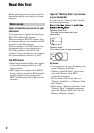
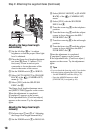
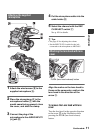
1 Set the ND filter B to 1 to adjust
brightness so that the proper video light
level is obtained.
2 Place the flange focal length adjustment
test chart A about 2-3 meters (7-10
feet) away. Zoom in and set your
camcorder to locate the center of the
chart in the center of the screen.
3 Set the ZOOM switch F to SERVO.
4 Select [AUTO ADJUST] in [FLANGE
BACK] of the (CAMERA SET)
menu (p. 73).
5 Select [YES] with the SEL/PUSH
EXEC dial E.
The flange focal length adjustment starts
and [EXECUTING] appears on the screen.
When the adjustment is completed,
[Completed..] appears on the screen.
If the adjustment fails, [Could not adjust.]
appears on the screen. Try the adjustment
again.
Adjusting the flange focal length
manually
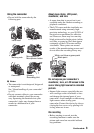
1 Perform steps 1 and 2 of “Adjusting
the flange focal length automatically.”
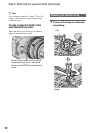
2 Set the ZOOM switch F to MANUAL.
3 Select [MANU ADJUST] in [FLANGE
BACK] of the (CAMERA SET)
menu.
4 Select [YES] with the SEL/PUSH
EXEC dial E.
5 Turn the zoom ring D to the telephoto
position.
6 Turn the focus ring C until the subject
comes in focus, then press the SEL/
PUSH EXEC dial E.
7 Turn the zoom ring D to the wide angle
position.
8 Turn the focus ring C until the subject
comes in focus, then press the SEL/
PUSH EXEC dial E.
When the adjustment is completed,
[Completed.] appears on the screen.
If the adjustment fails, [Could not adjust.]
appears on the screen. Try the adjustment
again.
z Tips
• You can check the focusing easily if you do the
following before adjusting the focal length.
– Set the PEAKING switch to ON (p. 31).
– Press the ASSIGN button to which
[EXP.FOCUS] is assigned (p. 48).
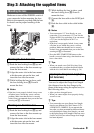
ZOOM
SERVOMANUAL
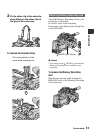
Step 2: Attaching the supplied items (Continued)