


Chapter 7 Menu Displays and Detailed Settings
135
7-3 Adjustments and Settings From Menus
1) Even when the MARKER item is set to “OFF” on the MARKER page of
the USER menu, the ASSIGN 2 switch allows you to display or not to
display all markers.
2) When the CBK-SC01 is not installed, this item does not appears since this
function is not effective.
3) This does not appear if nothing is assigned in the Assign menu.
Note
For functions that are assigned to the ASSIGN 2
switch, you cannot change those settings using other
menus. The function assigned to ASSIGN 2 switch
takes precedence over the menu setting.
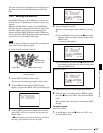
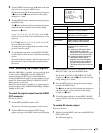
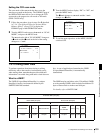
4
Turn the MENU knob to move the b mark to the item
you want to set, and press MENU knob.
The b mark changes to a z mark, and the z mark by
the setting changes to a ? mark.
5
Turn the MENU knob to switch to the desired setting,
and press the MENU knob.
The z mark changes to a b mark, and the ? mark
changes to a z mark, confirming the setting.
6
To continue with other settings, repeat steps 3 and 4.
To return to the previous page
Turn the MENU knob to move the b mark to “ESC” at the
right top of the window and press the MENU knob.
Alternatively, push the CANCEL/PRST / ESCAPE switch
down to the ESCAPE side.
To end the menu operation
Set the MENU ON/OFF switch to OFF or close the cover
of the menu operating section.
Operation of the ASSIGN 1/2/3/4 switches when
UA01 to UA10 are assigned
When an on/off switchable function (or menu item) is
assigned to one of the ASSIGN 1/2/3/4 switches, each time
the switch is pressed toggles the function on or off.
When another type of menu item is assigned, pressing the
switch displays the item and its setting value on the
viewfinder screen.
You can then change the setting by pressing and turning
the MENU knob.
The viewfinder screen display disappears approximately
three seconds after the last operation.
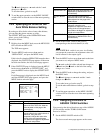
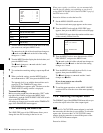
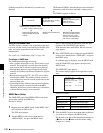
7-3-6 Setting the Date/Time of the
Internal Clock
You can set or change the date and time of the internal
clock. The date and time set are reflected in the time code.
Proceed as follows.
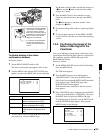
1
Holding down the MENU knob, move the MENU ON/
OFF switch to ON.
The TOP menu appears.
2
Turn the MENU knob to move the b mark to
“DIAGNOSIS”, and press the MENU knob.
If this is the first time the DIAGNOSIS menu has been
displayed, the CONTENTS page appears. If the menu
has been used before, the last accessed page appears.
3
If the CONTENTS page is displayed, turn the MENU
knob to move the b mark to “TIME/DATE”, and press
the MENU knob to display the TIME/DATE page.
If a different page is displayed, turn the MENU knob
until the TIME/DATE page appears, then press the
MENU knob to select the page.
4
Press the MENU knob.
The TIME ADJUST setting window appears.
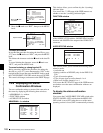
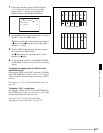
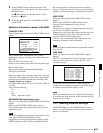
TEST OUT
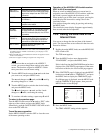
CHARACTER
Assigns the function to switch whether or
not the characters are mixed to the video
signal to be output from the TEST OUT
connector.
MARKER Assigns the ON/OFF function to display
all markers.
1)
ZEBRA Assigns the zebra pattern display
function to the switch.
D5600 Applies an electrical 5600 K filter.
EXT REC
CONTROL
Selects whether or not recording control
of external devices connected through
the CCZ connector (26-pin) of a CA-702
is possible.
REC VIDEO
SOURCE
2)
Selects which signals you will record
pictures being shot by the camcorder or
video signals from external equipment
connected to GENLOCK IN connector.
UA01 to UA10
3)
Assigns the items assigned in the
ASSIGN SEL menu.
Function Content
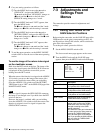
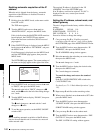
04 TIME/DATE
ADJUST : EXEC
HOUR : 12
MIN : 55
SEC : 58
YEAR : 00
MONTH : 07
DAY : 31