


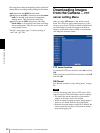
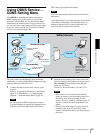

Administrating the Camera
Setting the Schedule — Schedule setting Menu
55
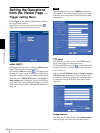
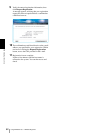
By selecting Image memory and clicking , a still
image of the moment you click is captured, and the
image file is recorded in the built-in memory.
When you click Image memory button, the Trigger
(setting) Image memory menu is displayed. You can
set necessary options here. The setting options and
setting procedures are the same as those of the Image
Memory setting menu (page 49).
Alarm output
Checking this box allows you to select Alarm output
from the trigger drop-down list in the main viewer.
You can control On (short circuit ) or Off (open) by
selecting Alarm output and clicking the .
OK/Cancel
See “Buttons common to every setting menu” on page
29.
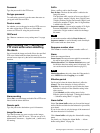
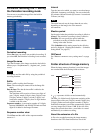
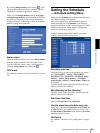
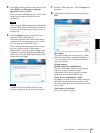
Setting the Schedule
— Schedule setting Menu
When you click Schedule on the Advanced mode menu,
the Schedule setting menu appears.
This is the same menu as the setting menu which is
displayed when you click Schedule to set Effective
period and Schedule in FTP client setting menu, e-Mail
(SMTP) setting menu, Image memory setting menu,
Alarm out setting menu and so on.
Example: When setting e-Mail (SMTP) (the alarm
sending) in the Schedule setting menu
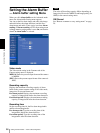
Schedule selection
Select the list box to specify the schedule you want to
set. e-Mail (SMTP) – Alarm, e-Mail (SMTP) –
Periodical, FTP – Alarm, FTP – Periodical, Image
memory – Alarm, Image memory – Periodical,
Alarm output – Alarm or Alarm output – Timer can
be selected.
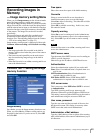
The time period on the right of the checked day is the
effective period of the schedule.
Mon (Monday) to Sun (Sunday)
The time period on the right of the checked day is the
effective period of the schedule.
Start time, End time
Specify the Start time and the End time.
Use the same time schedule every day
When this is checked, the Start time and End time set
to Mon (Monday) are applied to all days. In this case,
the Start time and End time of the other days than Mon
(Monday) cannot be input.
OK/Cancel
See “Buttons common to every setting menu” on page
29.