


Viewing/dubbing discs/ editing the recordings on your computer
95-GB
For Microsoft Windows Me users
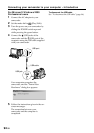
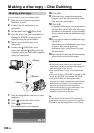
1 Connect the AC adaptor to your
camcorder.
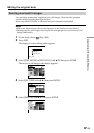
2 Set the mode dial to (Play/Edit).
3 Turn the power on your camcorder by
sliding the POWER switch upward
while pressing the green button.
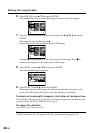
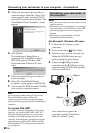
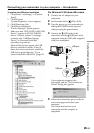
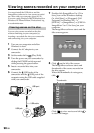
4 Connect the (USB) jacks of the
camcorder and the
(USB) port of the
computer using the USB cable supplied
with your camcorder.
Your computer recognises the
camcorder, and the “New Hardware
Found” dialog box appears.
5 Follow the instructions given in the on-
screen messages and restart your
computer.
The connection between your
camcorder and the computer is
completed.
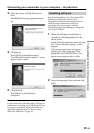
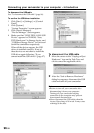
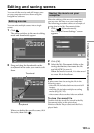
To confirm the USB driver installation
1 Click [Start] t [Settings] t [Control
Panel].
2 Click [System].
“System Properties” screen appears.
3 Click [Hardware] tab.
4 Click [Device Manager].
“Device Manager” screen appears.
5 Make sure that “SONY DDX-A1000 USB
Device” appears in DVD/CD-ROM
drives, “Generic volume” in Storage
volumes, and “USB Mass Storage
Device” in Universal Serial Bus
controllers respectively.
When all the devices appear, the USB
driver is installed correctly. If any of
these devices are not shown, install the
USB driver again following “If you
cannot install the USB driver” (page 97).
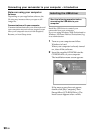
USB cable
USB port
USB jack
Connecting your camcorder to your computer – Introduction