


Brocade Network Advisor Installation and Migration Guide 53
53-1003373-01
Migrating data
3
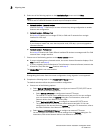
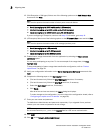
2. Choose one of the following options:
• If data is detected on your system, the Copy Data and Settings from previous releases
screen displays. To migrate data from the previous version installed (automatically
detected), select Yes, from the following location. Continue with
step 3.
• If data is not detected, the Copy Data and Settings from previous releases screen displays.
Complete the following steps:
a. Select Yes, from this machine or on network and click Browse to browse to the
installation directory.
b. Click Next on the Copy Data and Settings from previous releases screen. Continue
with
step 3.
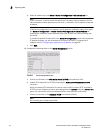
NOTE
If you are migrating from a 32-bit server, you will need to browse to the shared directory of
the 32-bit server on the Copy Data and Settings from previous releases screen.
NOTE
If you are migrating to the same install location (as the previous version), you will need to
browse to the renamed directory on the Copy Data and Settings from previous releases
screen.
3. To migrate historical performance data, select the SAN and IP check boxes, if necessary.
4. Click Start on the Data Migration screen.
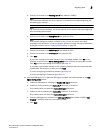
Data migration may take several minutes. When data migration is complete, the previous
version is partially uninstalled.
5. Click Next on the Data Migration screen.
If you have products associated with the Brocade North America or Brocade International Call
Home centers, a message displays. To map these Call Home centers to the Brocade E-mail Call
Home center after migration, click Yes. To not map these Call Home centers, click No.
NOTE
Make sure you configure the Brocade E-mail Call Home center (refer to the Brocade Network
Advisor User Manual or online help).
If you are migrating from Professional or Trial software, continue with step 6.
If you are migrating from Licensed software, go to step 7.