


Using WebCam Go as a Portable Camera 3-3
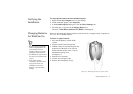
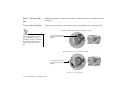
To focus the lens more
accurately
1. Start WebCam Go Control.
2. Adjust the camera’s focus ring until the preview displayed in WebCam Go Control’s window
is in focus (clear and sharp).
3. Click the button to close WebCam Go Control.
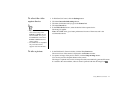
Step 2: To take
pictures
1. Unplug the USB cable from the camera.
2. Press the On button on the camera.
The camera is switched on and the remaining number of images that you can take is shown
by the Image counter.
3. To change the mode of the camera, press the Mode button:
❑
Single snapshot
Select this mode if you want to take single snapshots instantly.
❑
Multiple snapshot
Select this mode if you want to take a series of successive snapshots.
You can create an AVI file out of these snapshots.
❑
Delayed single snapshot
Select this mode if you want a snapshot to be taken after a specified length of time.
You can use this feature to take pictures of yourself.
❑
Delayed multiple snapshot
Use this feature when you want a series of snapshots to be taken after a specified length
of time. You can create an AVI file out of these snapshots.
• You can only switch on the
camera when it is
disconnected from the system.
• For description on the different
modes, see Figure 1-3,
“Buttons and LCD display on
WebCam Go.” on page 1-4.
• The counter value may
decrease by more than one
when a picture is taken if the
picture has more details or
colours, resulting in a bigger
file size. In some cases, the
counter value may not
decrease even though a picture
is taken.