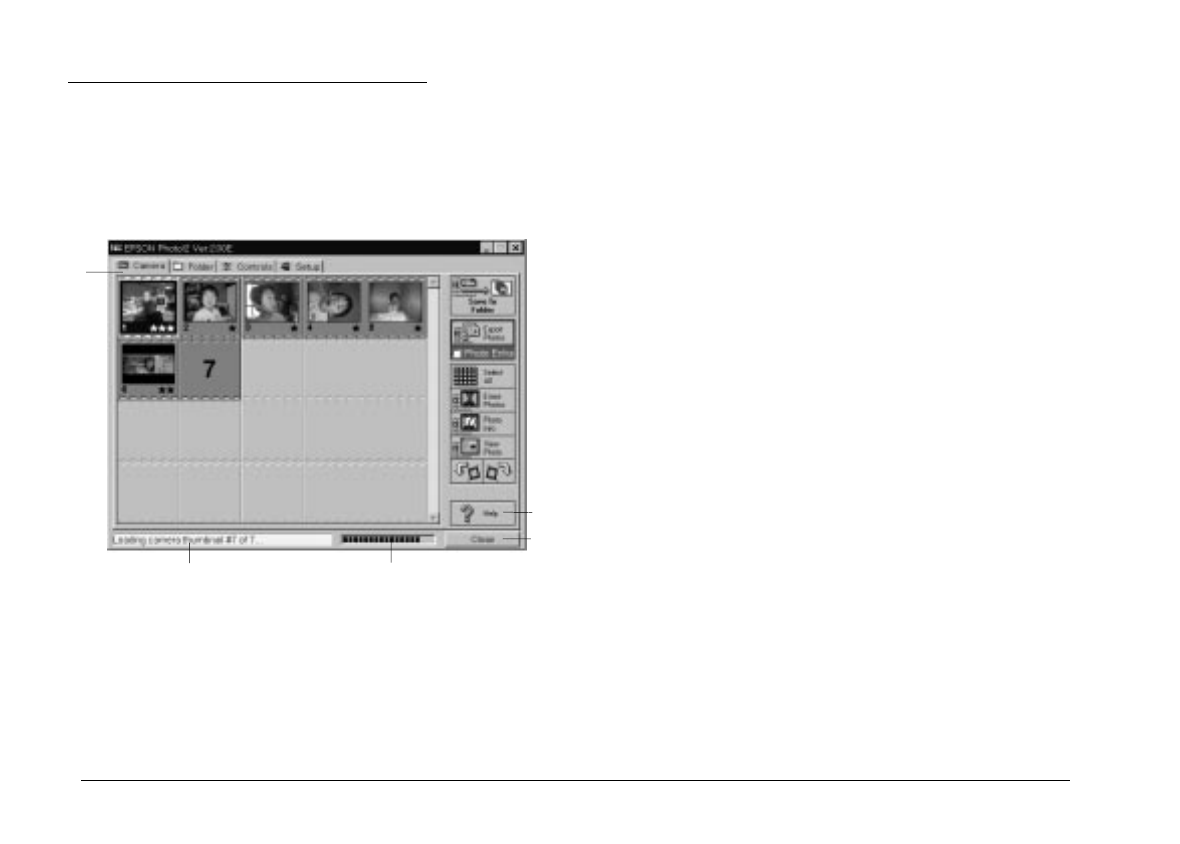
Working with EPSON Photo!2
When you open EPSON Photo!2, an introductory screen
appears briefly in the EPSON Photo!2 window, then the
Camera menu appears, indicating your camera and
computer are connected properly.
If the Setup menu appears in place of the Camera menu,
your camera and computer may not be properly
connected. Make sure your camera is correctly connected
to your computer, and click the
Test Connection
button.
If you still cannot open the Camera menu, see page 2-22
for instructions on using the Setup menu to establish the
proper connection.
Note:
While the camera and the computer are communicating, star
icons move across the camera’s display panel. Avoid opening or
using other applications during this time; otherwise
communication may be interrupted.
Click the menu tabs along the top of the EPSON Photo!2
window to open the following menus:
Camera
The Camera menu displays small thumbnail images of
all the photos stored in the camera, so you can easily
select which images you want to transfer to the computer
or erase from the camera.
If an optional CompactFlash Card is installed in the
camera, the Camera menu displays the images stored in
the card instead of the images stored in the camera’s
internal memory. If you want the images stored in the
camera to be displayed, simply take out the
CompactFlash Card from the camera.
Folder
The Folder menu displays thumbnail images of photos
that have been saved to a folder. From this menu you can
select thumbnails and transfer photos to your
application, or erase them from the folder. Also, you can
upload images from your computer to your camera.
menu
tabs
status bar
progress meter
Help button
Close button
L
EPSON Photo!2 Rev.C
A5 size Chapter 2
5/8/98 pass 0
2-6
Using EPSON Photo!2
