Cintel International Ltd. diTTo User Guide
Issue 3 17
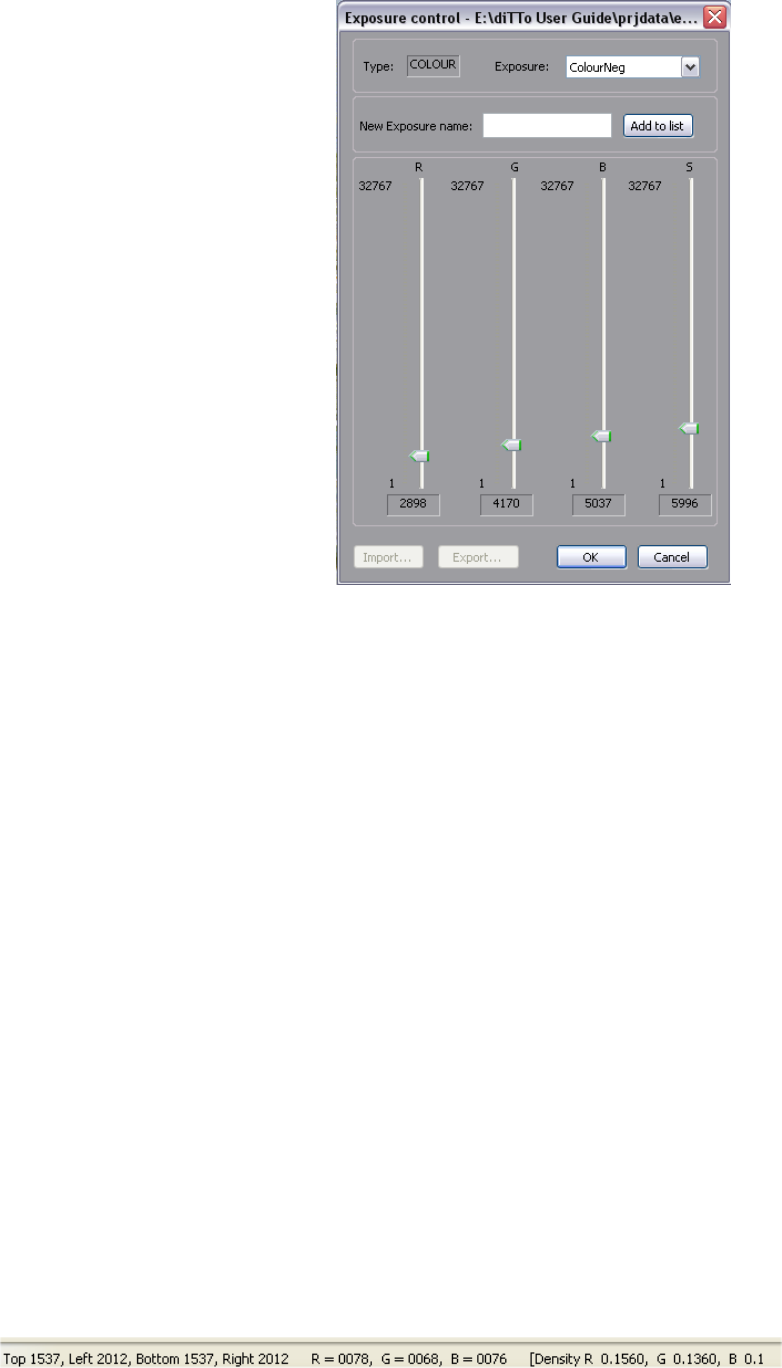
Tools: Exposure Control
Warning.
Adjustments of the Exposure will invalidate the settings
Of DMIN and may not comply with Cineon DPX standards.
Be careful with this adjustment, it is very easy to cause the scan
to cut-off (clip) some of the image detail in the highlights or
lowlights
Resetting DMIN will return Exposure values to a default.
The Exposure control provides the ability to individually adjust
the ‘setting’ of the Red Green and Blue signals. The adjustment
varies the light exposure time of the Red, Green and Blue
illumination and can therefore make a minor change the scan
time.
Multiple settings can be made and each setting can be named
by Add to list
Named Exposure settings are saved with the current project
Fig 23 Exposure Control Window
Tools: Auto Shading Correction
Automatic shading compensation caters for any optical variations (RGB) and calibrates the camera cell white and
black balances. It is customary to perform a shading align weekly only after verification of a clean optical path. (See
maintenance section Page 26).
1. Perform only with an open gate. Unload servo and remove film. Ensure gate is in loaded position.(See page 21)
2. Select Auto Shading Correction
3. Follow the on-screen prompts (Note: operation takes approximately 5 Minutes)
4. The resultant Shading file is saved by default on the local C Drive and is automatically applied to all future scans.
Tools: DMIN Calibration (Minimum Density setting)
DMIN calibration gives automatic exposure balance to level 95 (~1% level) of the Cineon transfer function. This target
level can be set to an alternate value in New Project Wizard (Page 12) or Project Settings (Page 31). See Appendix 1
for more details about DPX files and levels.
1. Load required film and transport to required clip
2. Select DMIN Calibration and follow the on screen prompts
The scanner will automatically rack the film until the framing bar is visible and then select a portion of the framing
bar to use as the DMIN. The scanner will ask for confirmation at this point.
3. If the area automatically selected has some picture information visible or a better area is available, Use the mouse
to drag a sample window over a new desired area. (Verification of minimum levels can be seen in the Pixel Picker)
Select OK and wait until the calibration is complete.
Progress can be viewed on the pixel picker feedback at the bottom of the GUI by observing the RGB levels
moving towards a level of 95 or other level if set differently in the Project Settings. Note that the values may not
display as exactly 95 as the picker averages the pick area values including any dust etc. However the DMIN
Calibrator ignores any values greater than the lowest and will therefore ignore dust etc. The film is now
automatically calibrated to Cineon DMIN specification.
Fig 24 Pixel Picker Feedback
at bottom of GUI
Picker location and size Average value Average density


