Cintel International Ltd. diTTo User Guide
Issue 3 26
Gate Lacing
1. Make sure the transport is in ‘Unloaded’ mode by depressing the Stop/Unload button.
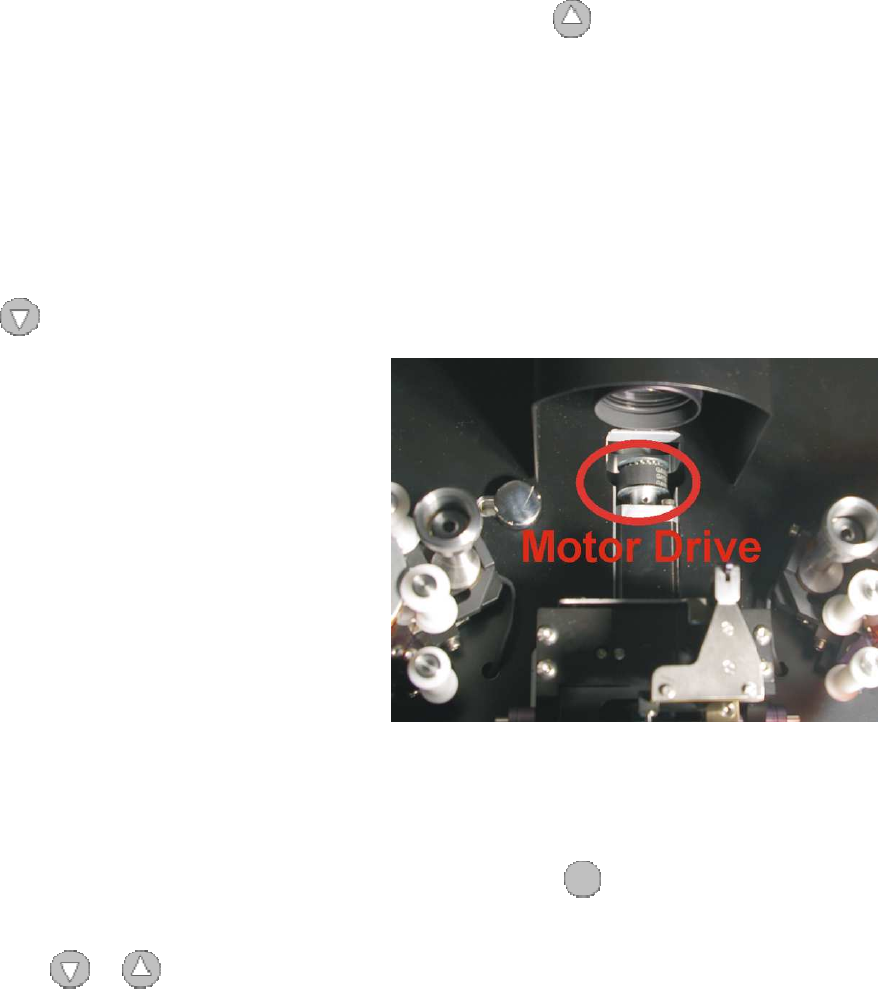
2. Raise the gate stripper plate up off the fixed register pins by pressing . Sometimes you need to slightly rotate
the motor drive to free up the plate. See Fig 41 and 43
3. Lift the shuttle pins up and latch it in the upper position. See fig 36
4. Lace the film between the plate top and bottom.
5. Have the frame bar positioned in the middle of the gate aperture. Make sure the fixed register pins are lined up
with the film perforations. The shuttle pin should line up with the perforation just to the left of the framing bar. You
may need a little physical adjustment by sliding the shuttle pins side to side until over the perforations by rotating
the motor drive (Fig 43) until the plate and shuttle pins are at the correct point in the cycle.
6. Unclip the shuttle pin latch and lower the pins carefully down and into the film perforation. See Fig 36 & 41
7. Press to lower the plate down onto the pins. The Transport should then automatically frame the film and
bring the image into focus.
8. Do not operate the transport with the lacing latch
(Fig 36) in the up position as this could damage
some film perforations
Fig 45 Location of Motor Drive
Load Transport Tension
Make sure the film is correctly laced through all rollers and sprockets then take up any excess film onto the reels
1. Make sure film is not slack and load transport by pressing and holding
2. If everything is OK with the film path, and the wind direction (A or B) is correct on both Feed and Start-up reels,
press either
or
to confirm the LOAD
.
The Transport is now fully tensioned and ready for operation. This can be checked by pressing the Inch FWD or
REV buttons to verify correct transportation.


