10 A-61579 February 2007
MAINTENANCE
All paper scanners that transport documents create paper dust and collect ink residue on the
components of the transport that come into contact with the paper. This section of the class will
detail the proper cleaning procedures for your scanner. The most frequent image quality
problems with document feeding scanners are lines or streaks in the scanned image and black
image borders (which are almost always caused by dust on the imaging components of the
scanner). A Kodak recommended cleaning frequency schedule will be covered that, if followed,
should prevent any unnecessary interruptions in scanning or service calls due to problems
related to improper maintenance. The instructor will also review the equipment you should
purchase (vacuum) and supplies that should be used when cleaning the scanner. We will also
cover some things that should not be done when cleaning the scanner as they may damage the
scanner.
¾Open the User’s Guide to Chapter 5, Maintenance and the review the complete scanner
cleaning procedure noting the following:
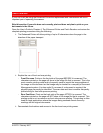
- Vacuuming the transport is essential to removing dust.
- Streaks or lines in the scanned image that are in the direction of the documents
travel are likely caused by dust or debris on the imaging guides or in the image path
(lower cover glass between the lamps). Also note that the back side of the imaging
guides must be cleaned as well as the front side.
- The front side of the imaging guide is in the top or pod side of the transport and the
rear side of the imaging guide is in the bottom or base side of the transport. If a
streak is visible on the front side scanned image, then clean the imaging guide in the
pod.
- For the scanning of the back of documents there is a cover glass that is beneath the
lower imaging guide that may collect dust during scanning. When cleaning the
scanner, be sure to remove the lower imaging guide and clean this cover glass.
¾Review the Quick Tips Guide noting the frequency chart for maintenance procedures.


