9190 Data-transfer mode
CHANGING THE MEMORY CARD - DATA-TRANSFER MODE
Windows XP, 2000 Professional, and Me
1. Stop the USB connection using the unplug-or-eject-hardware routine (p. 88).
2. Turn off the camera.
3. Remove, insert, or replace the memory card.
4. Turn on the camera to remake the USB connection.
Windows 98 and 98 Second Edition
Macintosh
1. Turn off the camera.
2. Remove, insert, or replace the memory card.
3. Turn on the camera to remake the USB connection.
1. Stop the USB connection by dragging the drive icon into the trash (p. 89).
2. Turn off the camera.
3. Remove, insert, or replace the memory card.
4. Turn on the camera to remake the USB connection.
Never remove or insert the card when the indicator lamp is lit - the data or memory card
may permanently be damaged.
AUTO POWER SAVE - DATA-TRANSFER MODE
If the camera does not receive a read or write command within ten minutes, it will shut down to
save power. When the camera shuts down, an unsafe-removal-of-device warning may appear on
the computer monitor. Click “OK.” Neither the camera or computer will be damaged in this opera-
tion. Unplug the USB cable and turn off the camera. Remake the USB connection by reattaching
the cable and turning the camera on.
For the camera to be connected directly to the
computer and used as a remote imaging
device, the computer must be equipped with a
USB port as a standard interface. The comput-
er and the operating system must be guaran-
teed by their manufacturers to support USB
interface. See chart for system requirements.
The remote-camera driver software must be
installed. Specific application software, such as
Microsoft Net Meeting, is required to view the
images. This function cannot be used with
Macintosh computers.
REMOTE CAMERA SYSTEM REQUIREMENTS
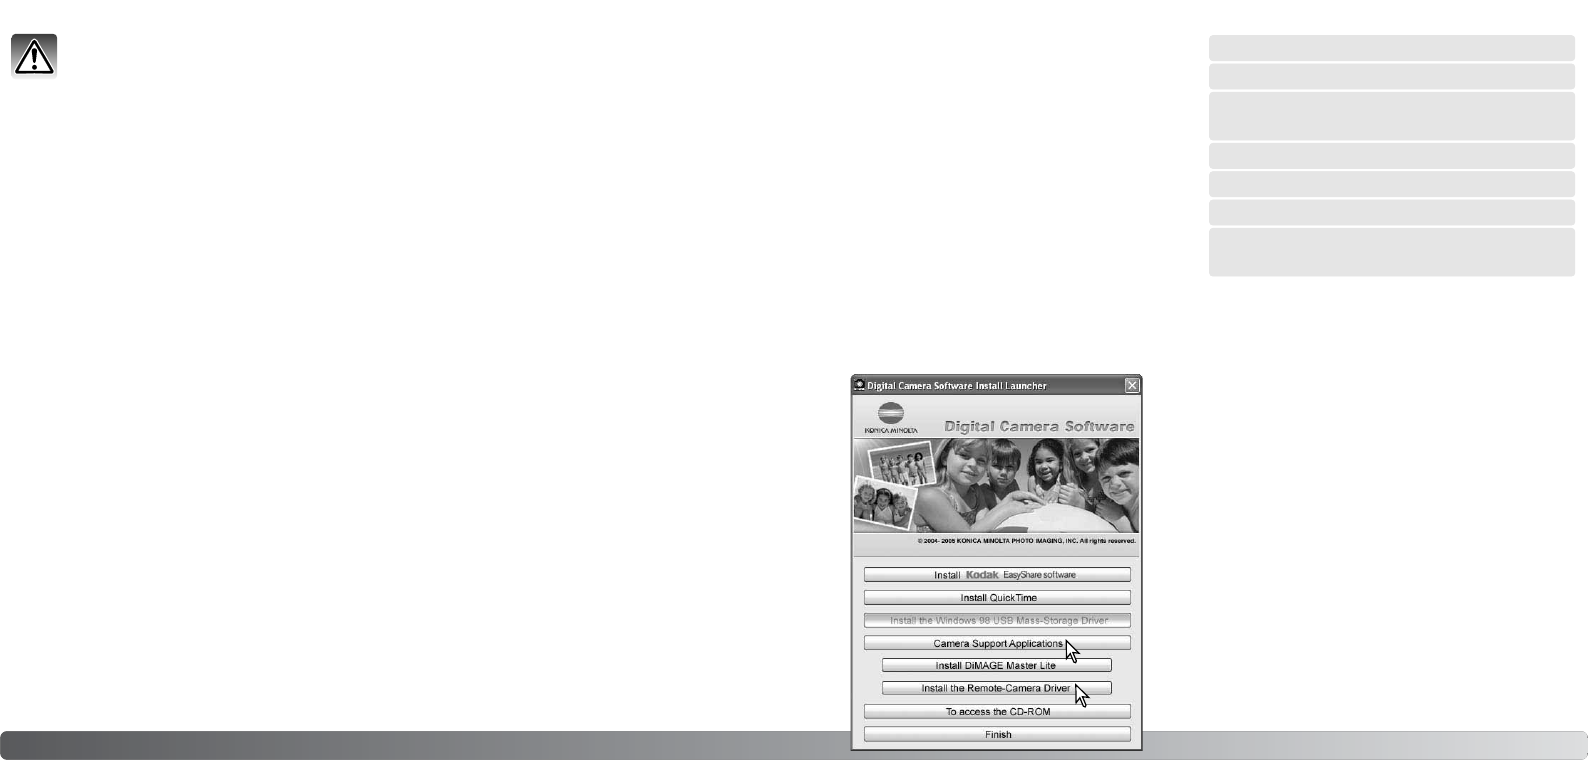
The driver needs only to be installed once. This driver is
not compatible with Macintosh operating systems.
Before connecting the camera to the computer, place the
Digital Camera Software CD-ROM in the CD-ROM drive.
The launcher should automatically activate. To install the
driver, click on the “Camera Support Applications” but-
ton, then click on the “Install the Remote-Camera Driver”
button.
Follow the instructions on the screen to install the driver.
Minimum system requirements
Pentium II 300MHz or later
Windows XP, 2000 Professional,
Me, and 98 Second Edition
128MB of RAM. 256MB with Windows XP.
200MB of hard-disk space
800 X 600 16-bit color monitor
Remote camera tested with Microsoft Net
Meeting and Windows Messenger
INSTALLING THE REMOTE CAMERA DRIVER


