


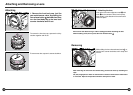
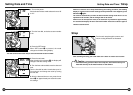

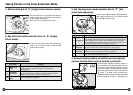


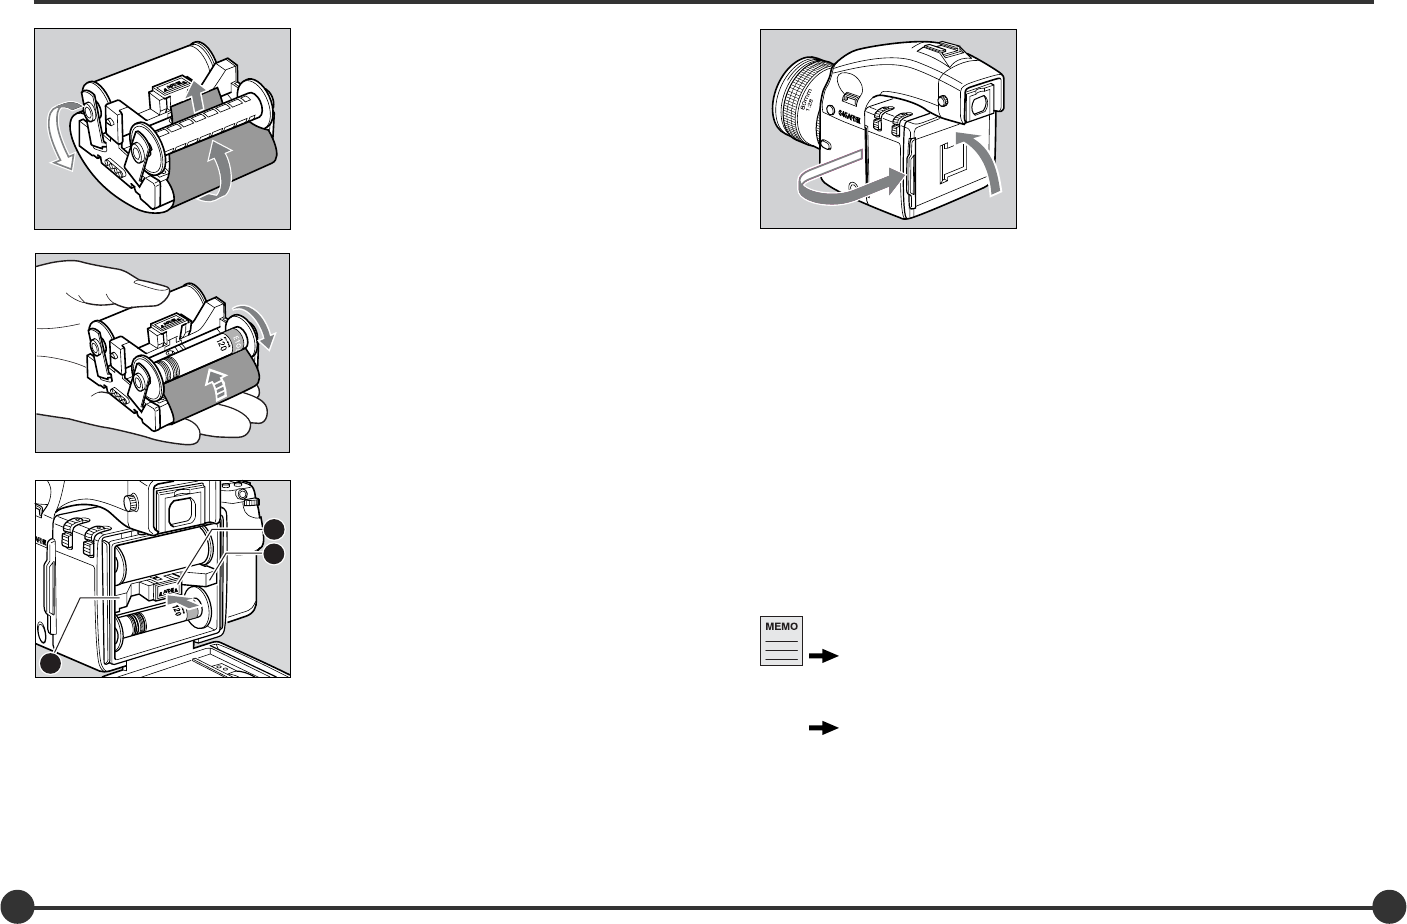
8. Close the back cover.
Push in the upper part of the back cover firmly to
close it.
Attach the magazine to the camera body. Pull out
the dark slide, and press the shutter release but-
ton halfway. This will advance the film to the first
frame.
Place the dark slide in the magazine's rear stor-
age pocket.
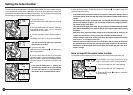
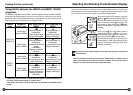
In this camera, the film is automatically advanced to the first frame. If it is not ad-
vanced properly, the film will continue winding for a certain period of time, after which
it will automatically come to a stop. If this happens, fewer frames (about 10 frames)
will be available for shooting. To be on the safe side, after taking 10 frames, take the
film out following the procedure for removing the film before reaching the end of the
film. (page 40)
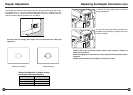
When the film is not wound properly, the “- - ” mark appears in the LCD.
If you do not operate the camera for 60 seconds, the camera will automatically enter
sleep mode in order to save battery power. In sleep mode, closing the back cover
does not trigger the automatic film advance, even if it is set so in the custom setting
(C-31 on page 96). In this case, press the shutter release button halfway down to feed
the film to the 1st frame position.
Film might be accidently exposed. Avoid intense light when loading/ unloading film,
and do not wrap too much of the leader paper into the spool.
31 32
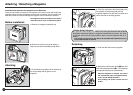
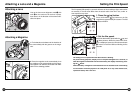
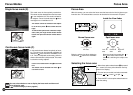
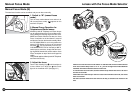
7. Insert the loaded film insert into
the magazine.
Pinch the knobs H and place the roll-film insert
in the housing. When the top of knob H is pushed,
the left and right latches open up, and the inner
frame clicks into place.
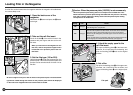
6. Attach the leader paper of the
film to the empty spool.
Run the film as shown, and insert the tip of the
leader paper into the slit of the empty spool. Wrap
the leader paper around the empty spool once or
twice by rotating it. Further adjustment of the film
position is not necessary. The camera automati-
cally advances the film to the first frame.
Press down gently on the loaded film, rotate
the “SPL” side spool so that the film does not
develop any slack, and wind the film tightly. If
the film is not wound tightly, the film winding
will loosen, possibly causing light fogging.
Make sure that the film insert is properly fixed. When one or both latches are out of
position, press the projecting portion
II
II
I or
JJ
JJ
J until it clicks into place.
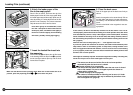
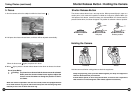
Loading Film (continued)
1. The camera can be set to wind the film to the 1st frame position
automatically after the back cover is closed.
Custom settings (C-31 on page 96)
2. The camera will not release the shutter when the rear cover is closed
with no film loaded. This can be changed to permit the shutter to
release with or without film.
Custom settings (C-30 on page 96)
3. The number of frames available for shooting can be set to 15. Under
certain shooting conditions, this may be affected by the failure of the
film to straighten out. (page 76)
I
J
H