74
For assistance, please call : 1-800-211-PANA(7262) or send e-mail to : consumerproducts@panasonic.com
3
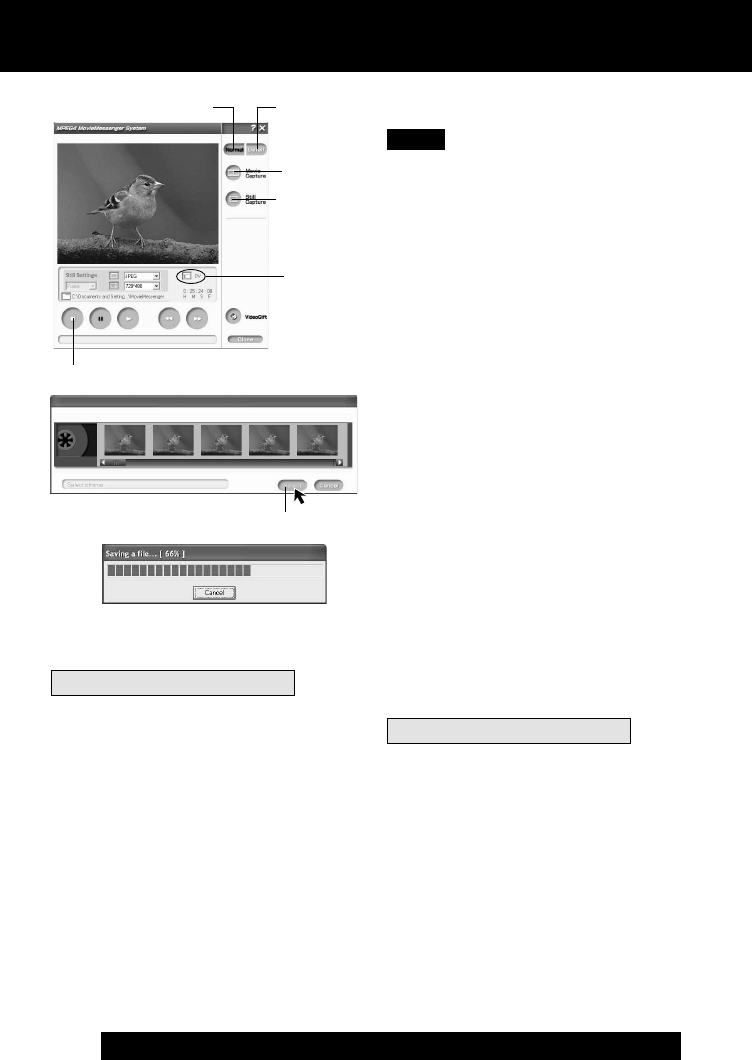
Click on [Detail].
4
Click on [Movie Capture] at the
point you wish to capture a Motion
image.
• The screen to select the start frame is
displayed.
5
Select the start frame for the
segment to be captured select one
frame, and click [Select].
•“Now Searching...” is displayed, and
the DV tape is rewound to the point
at which the capture was started.
•“Now capturing a movie.” is
displayed.
6
Click on [Stop] to end capture.
• The screen to select the end frame is
displayed.
7
Select the end frame for the segment
to be captured select one frame, and
click [Select].
•“Saving a file...” is displayed.
• The image is transferred to the PC in
real time.
[When selecting Detail]
• Detail mode lets you specify the start and
end frames for the video segment you
want to capture and save.
4
Still
Capture
4
Movie
Capture
DV
3, 3
Detail
Note
6
STOP
To capture Still images
3
Click on [Normal].
4
Click on [Still Capture] at the point
you wish to capture an image.
• Repeat step 4 to continue capturing
images.
• Captured Still images are saved to
the PC, and you can playback the
saved images on the View Manager.
(P. 62)
5, 7, 5
Select
PHOTOVU/MPEG4 Movie Messenger™ System (i.LINK)
[When selecting Normal]
3
Normal
To capture Still images
3
Click on [Detail].
4
Click on [Still Capture] at the point
you wish to capture images.
• The screen to select frames is
displayed.
5
Select the frame for the segment to be
captured select frames, and click
[Select].
• Repeat steps 4 and 5 to continue
capturing images.
• Captured Still images are saved to
the PC, and you can playback the
saved images on the View Manager.
(P. 62)
[When selecting Detail]
PV-DV52 / PV-DV52-S / PV-DV102 / PV-DV202 / PV-DV402
78
