3 • Configuring the RAS for operation Model 3120 RAS Getting Started Guide
42 Configuring the RAS with a Web browser
Configuring the line settings
1. Click on the Line Type pop-up menu (see figure 29 on page 41) and choose from the following options:
– For an E1/PRI line your options will be either dsx1E1(4) or dsx1E1-CRC(5)
– For an E1/R2 line your options will be either dsx1E1-MF(6) or dsx1E1-CRC-MF(7)
2. Click on the
Line Coding pop-up menu (see figure 29 on page 41) and choose either dsx1AMI(5) or
dsxHDB3(3). Most installations will use HDB3.
3. Click on the
Line Build Out pop-up menu (see figure 29 on page 41) and select e1pulse(1).
4. Click on
Yellow Alarm Format pop-up menu (see figure 29 on page 41) and choose from the following
options:
– For an E1/PRI line choose linkYellowFormatDL(2)
– For an E1/R2 line choose linkYellowAlarmFormatBit2(1)
5. Click on
Submit Query.
At this point, the WAN front panel LEDs will become active. A solid green FRAME light indicator means that
the RAS has synchronized with the E1 line.
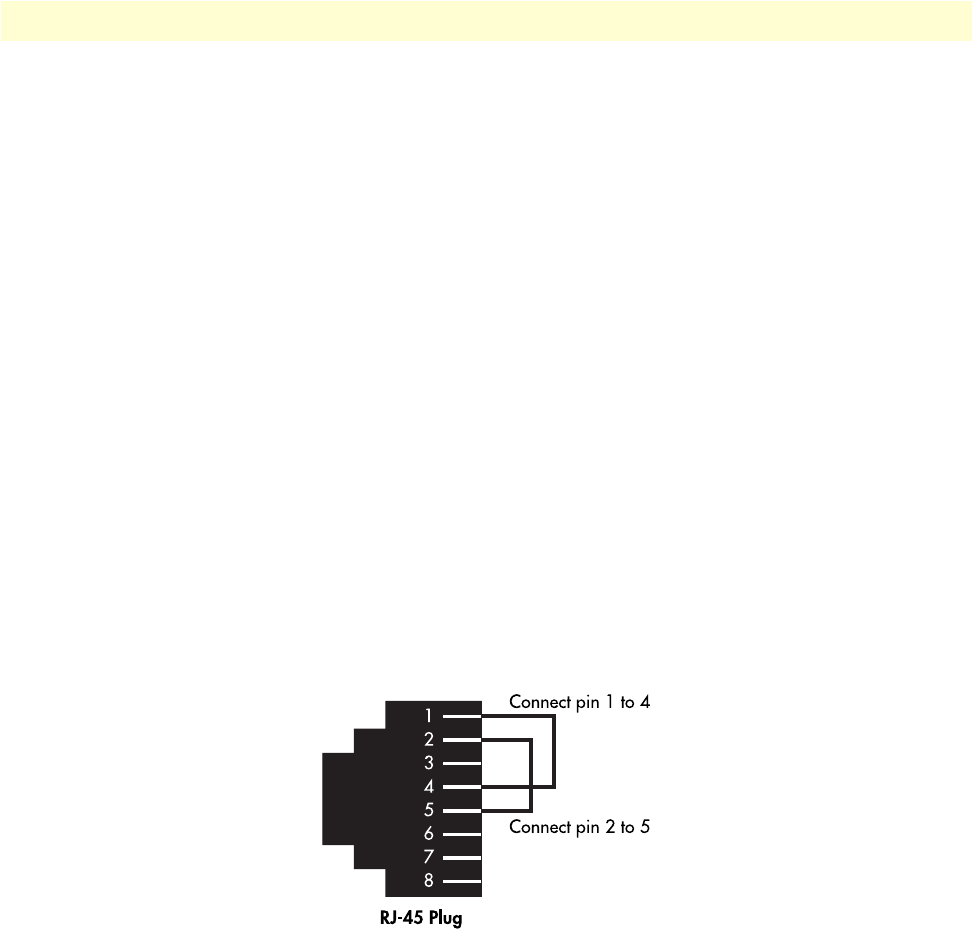
Note If you suspect that there is a physical malfunction in the WAN ports,
you can assemble a loopback connector to test the port (see
figure 30).
Figure 30. Pinout for loopback to test WAN port
If you have an E1/PRI (ISDN) line, refer to “Setting the line signaling for an E1/PRI (ISDN) line”. Otherwise,
refer to “Setting the line signaling for an E1/R2 line”.


