


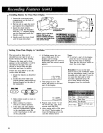
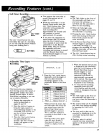
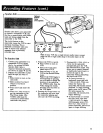


- Self-Timer Recording
SELF _MER
Button
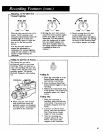
The SELF TIMER button lets you
time-delay the start of a recording
so you can join the picture without
being seen walking into it.
(1 23 ) SELFT,.E.
• First prepare the camcorder to
record. Instructions are on
pages 18 and 19.
• While the camcorder is in the
Record/Pause mode, press the
SELF TIMER button once. The
camcorder will automatically
start recording after
approximately ten seconds and
will continue to record
approximately 30 seconds.
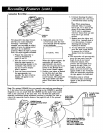
• If you want the camcorder to
record longer than 30 seconds,
press the SELF TIMER button
twice (instead of once) while the
camcorder is in the Record/
Pause mode. After ten seconds
the camcorder will start
recording and continue to record
until the Record Start/Stop
button (thumb trigger) or PAUSE
button is pressed.
Notes:
• The Tally Light on the front of
the camcorder will flash to let
you know the self-timer is
activated and the camcorder is
about to start recording.
• When the Tally light stops
flashing and lights continuously,
the camcorder is recording.
• Pressing the SELF TIMER button
three times during the Record/
Pause mode cancels the self-
timer recording.
• If the Record Start/Stop button
(thumb trigger) is pressed while
a self-timer recording is in
progress, the recording will stop
and the camcorder will enter the
Record/Pause mode.
• The SELF TIMER button has no
effect during normal recording.
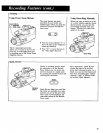
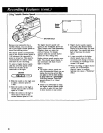
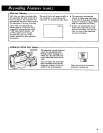
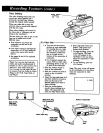
-Adjustable Time-Lapse
Recording
DISPLAY
Button
This feature lets you compress
slow-moving action (like nature or
photography studies) into clean,
quickly viewed videos. It allows
intermittent recording so you can
use a cassette efficiently.
1. Prepare the camcorder to
record as described on
pages 18 and 19.
2. Press the DISPLAy button to
bring the tape-counter (or
time-remaining) display to the
viewfinder, lhis will let you
see the INTERVAL display
when it appears.
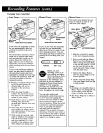
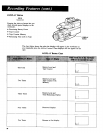
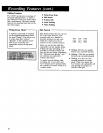
3. Press the TIME LAPSE button
for approximately two
seconds. The first INTERVAL
display will appear in the
viewfinder.
INTERVAL 0:30
4. Press the TIME LAPSE button
repeatedly until the length of
time you desire between
recordings appears in the
viewfinder. Refer to the chart
below.
0:30 30-Second Interval
1:00 l-Minute Interval
2:00 2-Minute Interval
5:00 5-Minute Interval
MAN Manual Interval*
*Manual Interval means that
the camcorder will record for
one second every time the
Record Start/Stop button
(thumb trigger) is pressed.
This is used for animation
recording as described on the
next page.
Pressing TIME LAPSE again
when the MAN display is
showing will remove the
INTERVAL display from the
screen.
5. When the desired interval time
is displayed in the viewfinder,
press the PAUSE button or the
Record Start/Stop button
(thumb trigger) to start
interval recording. The
camcorder will record for
approximately one second
every interval. The time until
the next recording will be
displayed in the viewfinder.
6. To stop interval recording,
repeatedly press the TIME
LAPSE button until the word
INTERVAL disappears from the
viewfinder.
Notes:
• The Tally Light on the front of
the camcorder will light to let
you know when the camcorder is
recording.
• The interval time can be changed
any time (even during recording)
by pressing the TIME LAPSE
button.
• The time and/or date can be
recorded by displaying it in the
viewfinder during time-lapse
recording.
• Rainbow noise (a vertical
colored bar) may occasionally
appear in the picture during
playback.
29