


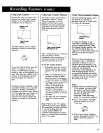


Video Dubbing
The video dubbing feature lets you
record new video (picture) on a
previously recorded tape without
erasing the original audio (sound).
When you video dub a tape, the
previous video is erased and replaced
with the new video.
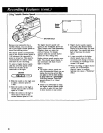
When video dubbing, the source for
the video dub is "whatever you are
seeing in the viewfinder".
The new video you want to put on the
tape can be added one of two
different ways:
• from whatever you focus the
camcorder on and see in the
viewfinder.
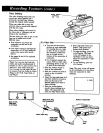
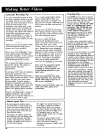
• from video coming in through the
camcorder's_v I_jack (using the
andio/video input cable shown
below).
• See pages 44 and 45 for optional
accessories.
Note: You can also dub both the
video and audio simultaneously ff
desired. To do so, press AUDIO DUB
and PLAY, then VIDEODUB and
pLAy in step 6 at the right. Be sure
to connect both the Audio & Video
Plugs to the VCR, Tape Deck, or
CD Player.
AUDIO
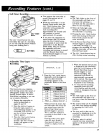
-To Video Dub
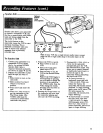
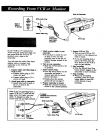
1. • You can use the camera
section on your camcorder
for creating the new video
to dub. To do so, remove
the connector cable from
the AVIN jack on the
bottom of the camcorder, if
connected.
• Or, if desired, connect the
source VCR or other video
generating device to the AV
IN jack of the camcorder.
2. Slide the POWER switch to
tam on the camcorder.
3. Slide the CAMERA/pLAYBaCK
switch to the PLAYBACK
position.
4. Insert the tape and press PLAy
and then REWIND to locate a
point on the tape a few
seconds before you want to
begindubbing.
5. Press the PAUSEbutton
exactly where dubbing is to
begin. The camcorder will
enter the Play/Pause mode.
6. Press and hold VIDEODUB
button. Then press PLAY.
Release both buttons.
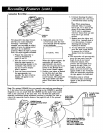
7. To begin dubbing, press the
PAUSE button. The word
V.DUBwill appear in the
viewfinder to let you know
when the camcorder is video
dubbing.
8. To end dubbing, press the
STOP button.
Note: The word V.DUBwill appear
in the viewfinder to let you know
when the camcorder is video
dubbing.
V.DUB
Whirs Audio PlUg
(No ConneXion)
Audio/Vldeo
(_ktd)
/
AV/N
Jack
35