


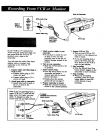
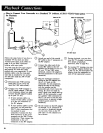
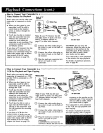


• Camcorder Recording Tips
Use your camcorder's zoom to help
you focus manually. Before you start
recording, zoom in on your subject,
adjust the Focus Ring until you see a
clearly focused image in the
viewfinder, then zoom back to the
desired angle of view. Provided the
subject-to-camcorder distance does
not change, the subject will remain in
sharp focus over the entire zoom
range. REMEMBER: It's easier to
make professional-looking videos if
you check the focus before you start
recording.
Keep your auto focus window clean
and unobstructed to help assure
proper auto focus operation.
Don't move your camcorder's Zoom
Lever quickly when controlling the
zoom lens manually. A slow, constant
speed gives your manual zooms a
more professional look on tape.
Try to make sure indoor scenes you
record are well-hi. This improves
picture quality and color
reproduction.
Avoid tong "still" shots of landmarks
and scenic attractions. Your
recordings will be more interesting if
they include people and detail. "'Local
color" will give your travel videos
lasting appeal. Consider taping a
familiar or landmark scene from an
unfamiliar vantage point to give your
tape added interest. Remember to
check your lighting before recording.
Practice recording under a variety of
; lighting conditions. This will help
prepare you to respond whenever you
see a scene you want to tape.
Try to avoid taping backlit subjects
indoors. Bright light behind your
subject may cause it to appear very
dark and low in detail. Adjusting your
IRIS control can help overcome this
problem.
Include close-up shots of individuals
when taping a family outing or other
group functions. These close-ups make
your video memories special.
Be aware of video and audio
backgrounds. Background visual
details you barely notice while you're
taping may show up as visual
"'clutter" when you review your taped
scene. Background noises (especially
television sets and radios, household
appliances, traffic sounds) can detract
from the sounds you want to record.
And REMEMBER: Don't bump or
tap your Camcorder's microphone
while you're taping, because this
sound will be recorded on your tape!
Don't move the camcorder rapidly
from side to side while you're
recording. A steady, gradual "pan"
avoids blurring and jitter in your
taped scene.
Keep your camcorder level while
taping. Otherwise, your scenes will
appear tilted. Keep a close eye on
this in your viewfinder!
Fading in and out between scenes can
make your videos appear more
professional.
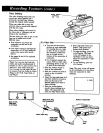
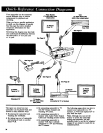
- Traveling Tips
CAUTION: If you wish to operate
the AC adapter/charger on a power
source other than 120 volts, 50/60
Hz, use only a transformer-type
power converter. Do not use "solid-
state" or "switching-type" power
converters. They will damage your
AC adapter/charger. An optional
CPS08 adapter/charger may be
purchased from your RCA dealer.
The CPS08 is designed for use on
100-240 volts, 50/60 Hz. See
pages 44-45 for optional
accessories.
Jot down your camcorder's serial
number and keep this note separate
from your equipment when
traveling. If your carncorder is lost
or stolen, you will be able to
identify it.
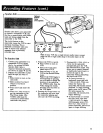
Use extra care and caution to avoid
damage to your camcorder and
accessories when operating them at
a beach or pool. Spray, sand, and
dust should be avoided. Clean your
lens gently and thoroughly if it has
been exposed to the elements.
Remember to use only proper lens
cleaning supplies available at
camera stores to protect your lens.
Carry your camcorder in a proper
case when traveling. (See page 44
for the specially designed soft and
hard carrying cases.) An ordinary
suitcase or carry bag doesn't offer
the protection and custom fit your
camcorder needs. For safety, treat
your camcorder as carry-on
baggage to protect it from rough
handling.
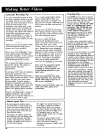
. Shutter Speed Tips
By increasing the shutter speed,
you'll be able to watch better stop-
action and stow-motion pictures
when you play the tape back on a
good-quality home VCR that has
these special effects.
The higher the shutter speed, the
less blurring you'll see during stop-
action, frame advance, and slow-
motion. The faster your subject is
moving, the higher you'll want to
set the shutter speed.
The higher the shutter speed, the
more light is required to make a
good picture. So as you increase
the shutter speed, you may have to
increase the amount of light. You
will probably want to use the
highest shutter speed only in bright
outdoor light.
The shutter speed display in the
viewfinder will flash if you need to
reduce the shutter speed (or
increase the amount of light) while
recording.
42