42
If you are using the camera for the first time, read this section.
Deleting Multiple Files
You can select multiple files for simultaneous deletion either
individually or by selecting one or more ranges consisting of two
images and all photographs between them. To delete multiple files,
press the D (Delete) button in playback mode and follow the steps
below (to exit at any time without deleting images, press DISP.).
Specifying Multiple Files Separately
1
Press the !" buttons to select [Delete Multi] and then
press the MENU/OK button.
• Omit this step if the camera is already in multi-frame view.
2
Press the !" buttons to select [Sel. Indiv.] and then press
the MENU/OK button.
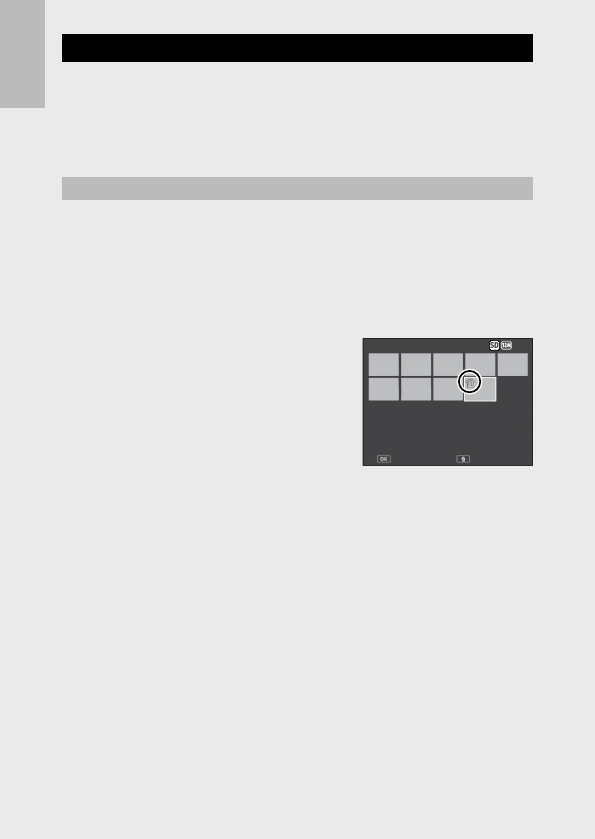
3
Press the !"#$ buttons to select
the file you want to delete and
press the MENU/OK button.
• The trash symbol is displayed in the
upper left corner of the file.
• Press the ADJ./MEMO button to switch
to the display for specifying a range of
files. See Step 3 and beyond on P.43.
4
Repeat Step 3 to select all the files you want to delete.
• If you selected a file by mistake, you can deselect it by selecting the
file and pressing the MENU/OK button.
• Press DISP. to cancel and return to Step 2.
5
Press the D (Delete) button.
6
Press the #$ buttons to select [Yes] and then press the
MENU/OK button.
Sel/Cancel
Sel/Cancel
Last File
Last FileDelete
Delete
Delete
Delete
3 F
4:3 F
Sel/Cancel
Sel/Cancel
Last File
Last FileDelete
Delete
Delete
Delete
3 F
4:3 F


