Alarm Settings (ALARM)
42
3
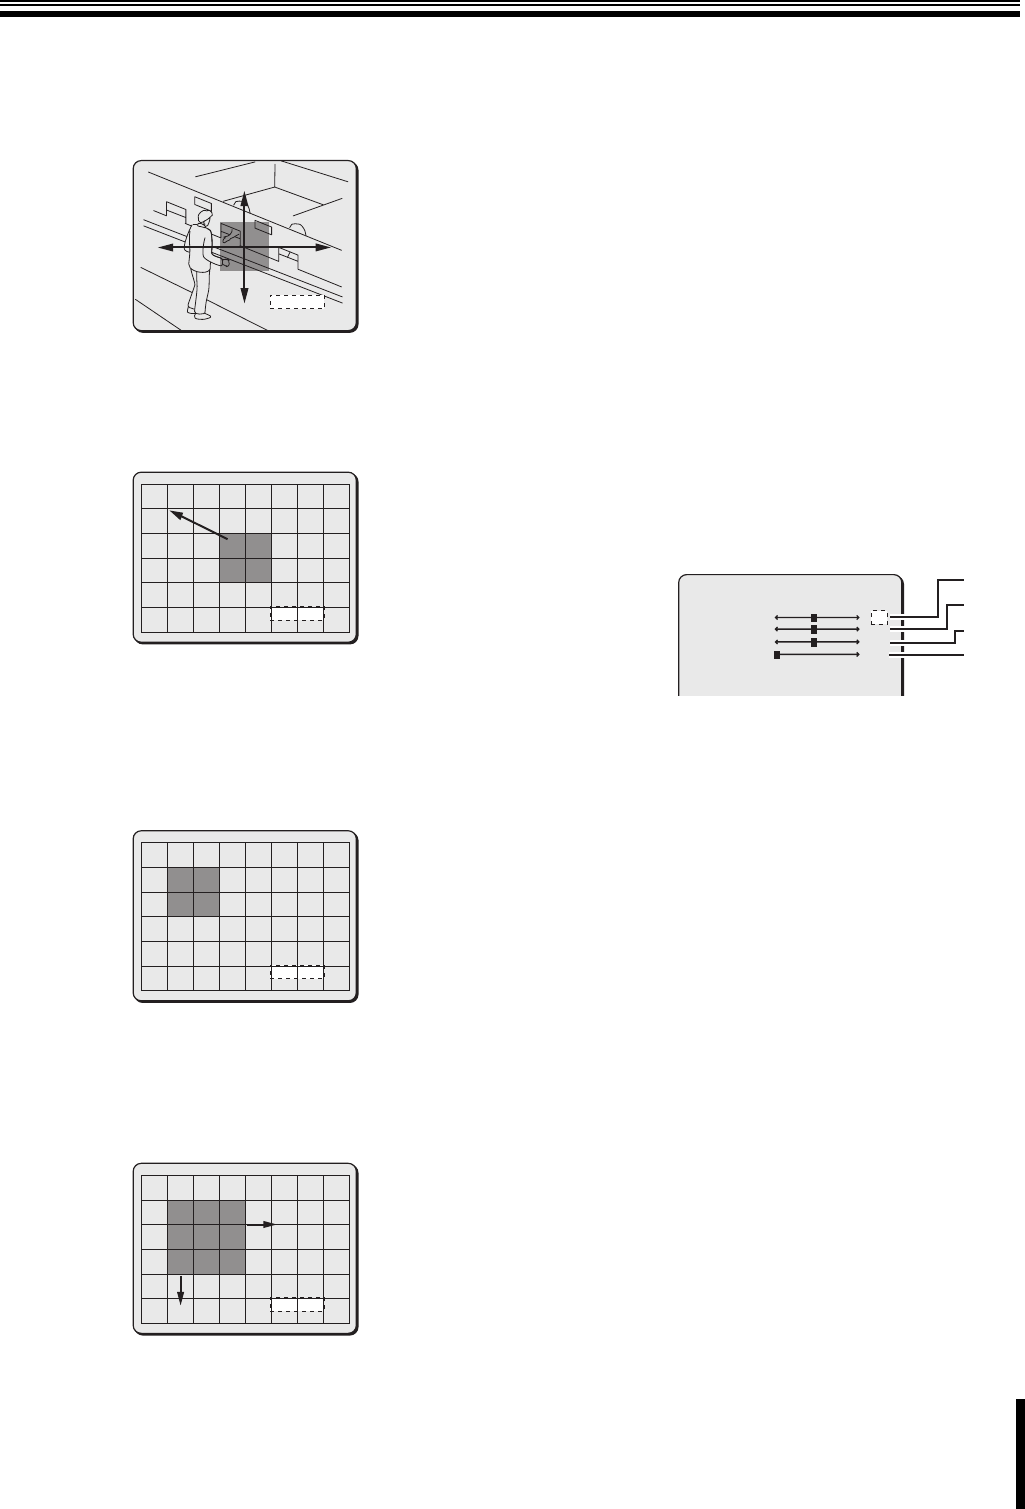
Use the joystick lever (xy) to select [POSITION] –
“SET y”, and press the [ENTER] button.
The AREA screen for setting surveillance area appears. In this
screen, while panning or tilting the camera, set the
surveillance area to detect movement.
4
Use the joystick lever to perform panning or tilting,
and press the [ENTER] button.
The POSITION screen appears displaying the detection
pattern (in smallest size) in the center of the screen. In this
screen, determine the position of the detection pattern.
5
Use the joystick lever to move the detection pattern
to your desired position, and press the [ENTER]
button.
Move the detection pattern so that the pattern is located at the
top left corner of the surveillance area.
Pressing the [ENTER] button displays the SIZE screen. In this
screen, determine the size of the detection pattern.
6
Use the joystick lever to adjust the size of the
detection pattern, and press the [ENTER] button.
Originating from the position of the detection pattern specified
in the POSITION screen, the joystick lever (y) expands the
pattern downward and the lever (w) expands the pattern to the
right.
After pressing the [ENTER] button, the AREA setting menu
appears again.
7
Use the joystick lever (xy) to select [DISPLAY] and
use the lever (vw) to select “ON/OFF”.
Select whether the surveillance area specified in the AREA
screen is displayed on the monitor screen or not.
Available settings:
•OFF: Does not display the surveillance area.
•ON: Displays the surveillance area.
8
To continue setting other surveillance area (2 - 4):
After returning to the MOTION ZONE screen, repeat the same
procedure (Steps 2 to 7).
b Setting the detection sensitivity
You can set the level of sensitivity for motion detection. Adjusting the
level of sensitivity avoids unwanted detection.
To set the detection sensitivity, perform the following procedure in the
MOTION ZONE screen.
1
Use the joystick lever (xy) to select [SENSITIVITY]
– “SET y”, and press the [ENTER] button.
The SENSITIVITY screen appears.
Set the detection level for the following parameters.
For all parameters, the larger the value, the lower the
sensitivity.
a Motion sensitivity (MOVE): 1 - 10
To avoid detection of small movements, make the value
larger.
b Brightness level (Y-LEVEL): 1 - 10
When noise from a dark screen is causing erroneous
detections, make the value larger.
c Brightness differences (Y-DIFFER): 1 - 10
To avoid detection of lights turning on and off, make the
value larger.
d Duration (DURATION): 1 - 60
To avoid detection of fast movements, make the value
larger.
2
To test the sensitivity settings, use the joystick
lever (xy) to select [TEST] and use the lever (vw) to
select a surveillance area number (1 - 4).
You can test the detection sensitivity for the specified
surveillance area.
When a motion is detected, patterns are shown in that
location. Adjust the setting values as necessary.
AREA 1
AREA 1
y
SET
POSITION
POSITION
y
SET
y
SET
SIZE
SIZE
y
SET
SIZE
SIZE
SENSITIVITY
MOVE
Y-LEVEL
Y-DIFFER
DURATION
TEST
a
b
c
d
5
5
5
1
OFF
