


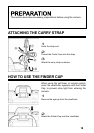


SETTING THE TIME AND DATE
The SD9 camera records the date and time when each image is captured and stores
this information with the image. To ensure that the correct information is recorded with
each image, set the camera’s internal clock to the correct date and time before using
the camera for the first time or after extended periods of disuse.
1
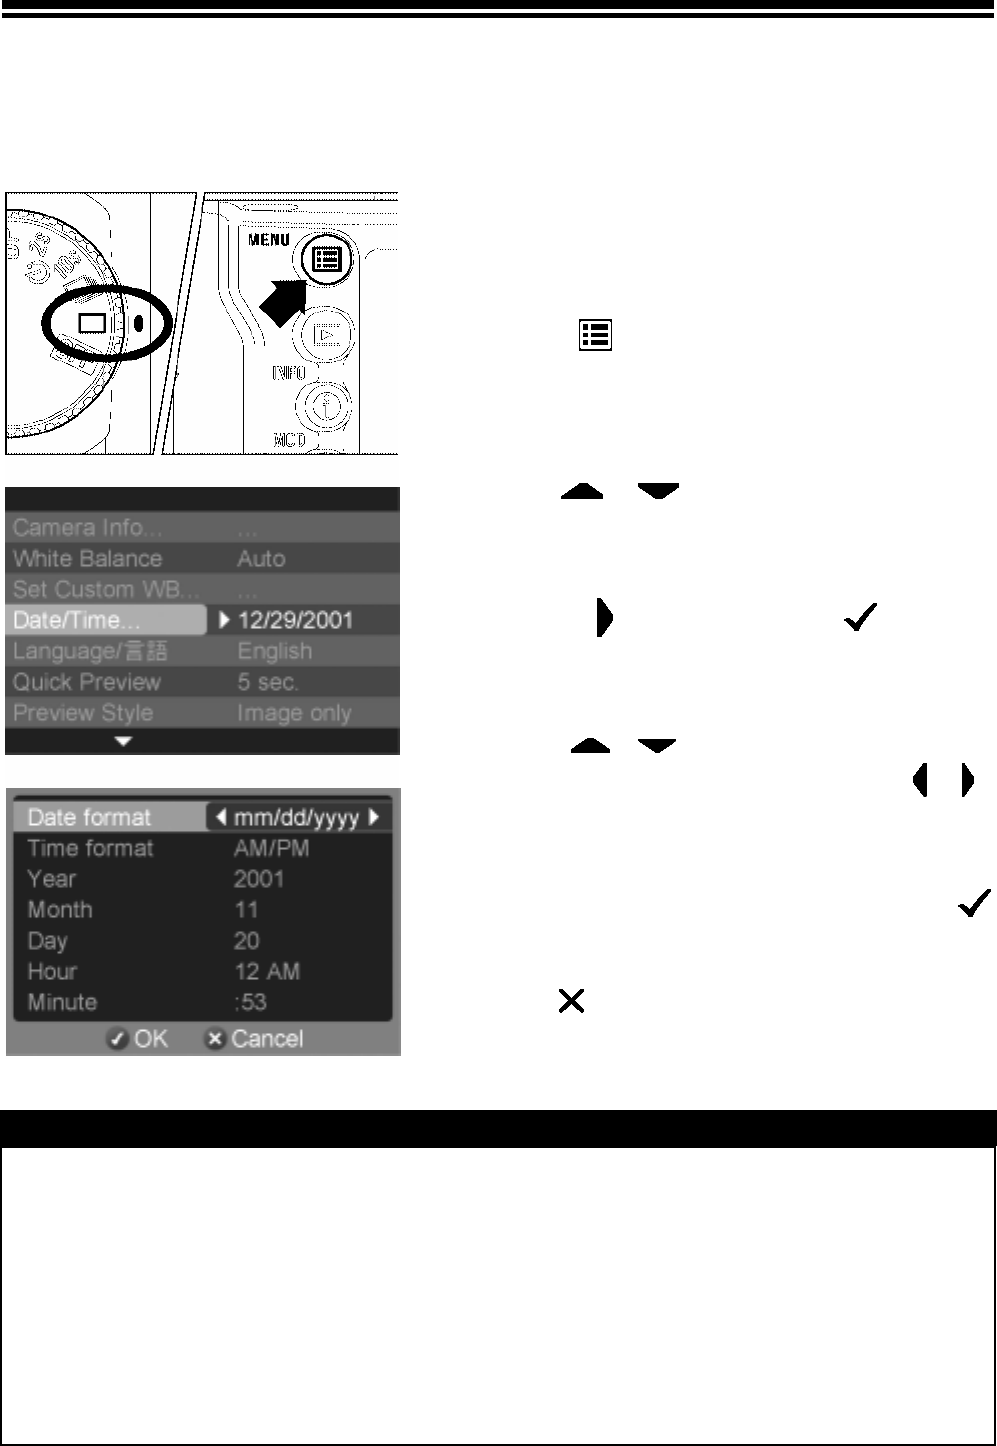
Make sure the camera is turned on.
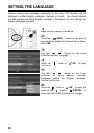
2
Press the MENU button on the back of
the camera to display the Camera Set-up Menu.
(See P. 9 6)
3
Use the arrows on the 4-way
controller to select “Date/Time…”.
4
Press the
arrow or the
OK to
open the date/time set-up page.
5
Use the arrows on the 4-way
controller to select a setting and use the
arrows to cycle through the setting options.
6
Once all changes have been made, press
OK
to save the settings and return to the main
menu.
· Press
CANCEL at any time to close
the date/time set-up page without saving any of
the changes.
TIP
· The date can be displayed in one of three formats: mm/dd/yyyy (month/day/year),
dd/mm/yyyy (day/month/year), or yyyy/mm/day (year/month/day).
· The camera’s internal clock is powered by a capacitor that receives its charge from
both sets of batteries. If the camera is without batteries for an extended period of
time, such as after prolonged storage, the internal clock will need to be reset.
· The date and time on the SD9 camera can be synchronized to your computer by
using the “Set Date and Time…” option in the Camera menu of SIGMA Photo Pro
software (See SIGMA Photo Pro Manual provided on the CD-ROM).
26