


112
Overnemen van video’s of TV-
programma’s
Via aansluiting met een i.LINK
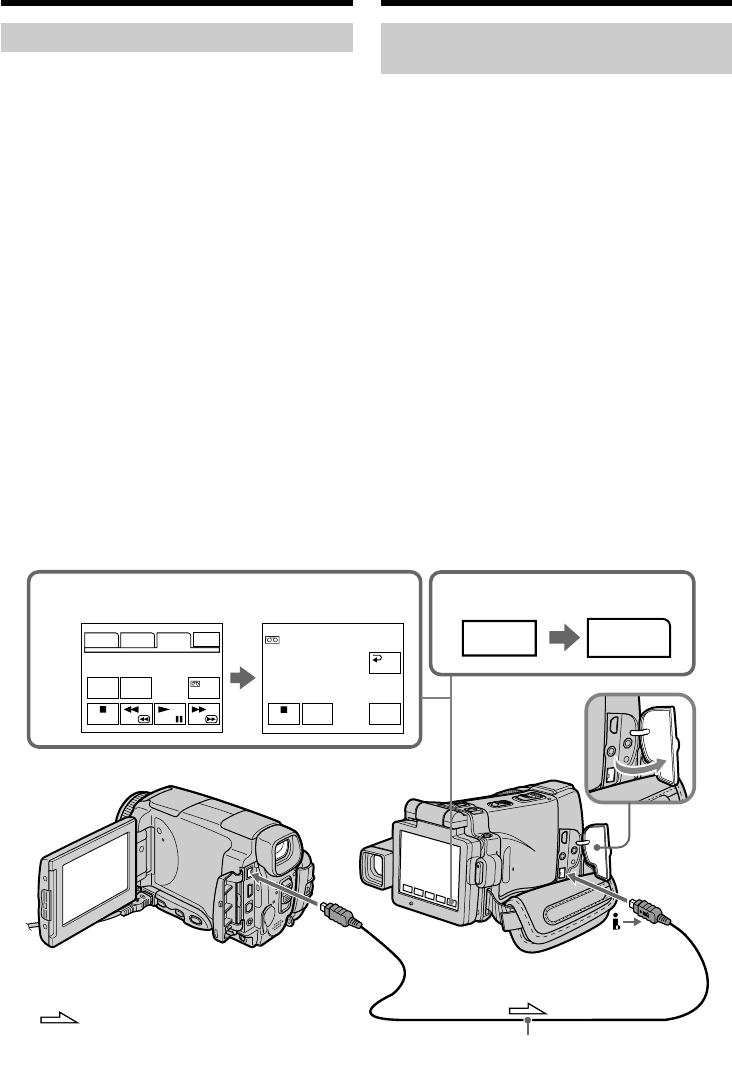
kabel
Sluit eenvoudigweg een i.LINK kabel (niet
bijgeleverd) aan op de de i.LINK (MICROMV
Interface) aansluiting van uw camcorder en de
i.LINK (MICROMV Interface) aansluiting van
een andere MICROMV videorecorder. Via deze
volledig digitale aansluiting worden de video- en
audio-gegevens doorgegeven in digitale vorm,
voor de beste montagekwaliteit. (U kunt deze
camcorder niet aansluiten op een DV product.)
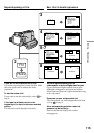
(1)Plaats een blanco (of voor opnemen geschikte)
cassette in uw camcorder en plaats de cassette
met de te kopiëren opnamen in de
videorecorder.
(2)Zet de POWER schakelaar van de camcorder
in de “VCR” stand.
(3)Start de weergave op uw videorecorder. De
beelden van de videorecorder zijn dan te zien
op het scherm van uw camcorder.
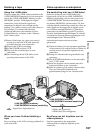
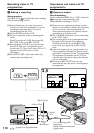
(4)Zet uw camcorder in de opnamepauzestand.
Druk op de FN toets om in te stellen op
PAGE3 en druk dan op de q REC CTRL
toets. Druk vervolgens op de REC PAUSE
toets.
(5)Druk op de REC START toets van uw
camcorder bij het punt waar u wilt beginnen
met opnemen.
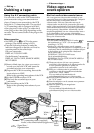
When using the i.LINK cable
Simply connect the i.LINK cable (optional) to the
i.LINK (MICROMV Interface) of your camcorder
and to the i.LINK (MICROMV Interface) of the
MICROMV product. With digital-to-digital
connection, video and audio signals are
transmitted in digital form for high-quality
editing. (You cannot connect your camcorder to a
DV product.)
(1)Insert a blank tape (or a tape you want to
record over) into your camcorder, and insert
the recorded tape into VCR.
(2)Set the POWER switch to VCR.
(3)Start playback on VCR. The picture from the
VCR appears on the LCD screen of your
camcorder.
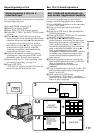
(4)Set your camcorder in the recording pause
mode.
Press FN and go to PAGE3, then press q
REC CTRL. Next, press REC PAUSE.
(5)Press REC START at the scene where you
want to start recording.
Recording video or TV
programmes
4,5
4
FN
PAGE3
REC
PAUSE
RET.
REC
START
PAGE1 PAGE2 PAGE3 EXIT
DATA
CODE
COUNT
RESET
REC
CTRL
REC CTRL
zX
0:01:18
i.LINK (MICROMV Interface)/i.LINK
(MICROMV Interface) aansluiting
: Signal flow/Signaalstroom
i.LINK cable (optional)/
i.LINK kabel (los verkrijgbaar)
i.LINK (MICROMV Interface)/
i.LINK (MICROMV Interface) aansluiting