


134
Menu Organization and Operation
Chapter 5 Menu Displays and Detailed Settings
3
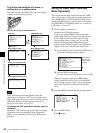
If the CONTENTS page is displayed, press the MENU
knob. Then select one of USER 1 EDIT to USER 19
EDIT, and press the MENU knob.
If a different page is displayed, turn the MENU knob
until the desired page appears, then press the MENU
knob.
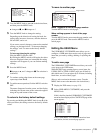
4
Press the MENU knob. Then select the line where you
want to add an item, and press the MENU knob.
The EDIT FUNCTION page appears.
5
Press the MENU knob. Then select INSERT, and
press the MENU knob.
The page for the last added item appears.
6
Add the items as follows.
1 Turn the MENU knob until the page that contains
the desired items appears, then press the MENU
knob.
2 Select the desired item, and press the MENU
knob.
The USER 9 EDIT page appears again, displaying the
newly added item.
7
Repeat steps 4 to 6 to add the remaining items.
You can add up to 10 items on one page.
To delete items from a page by using the MENU
knob
1
Follow steps 1 to 3 in “To add a new page” on page
133.
2
Press the MENU knob. Then select the item that you
wan to delete, and press and hold the MENU knob.
The item is deleted.
To delete items from a page by using the EDIT
FUNCTION page
1
Follow steps 1 to 3 in “To add a new page” on page
133.
2
Press the MENU knob. Then select the item that you
want to delete, and press the MENU knob.
The EDIT FUNCTION page appears.
3
Select DELETE, and press the MENU knob.
The previously displayed page appears again, and the
message “DELETE OK? YES b NO” appears at the
upper right.
4
To delete, select YES, and press the MENU knob.
To replace items on a page
1
Follow steps 1 to 3 in “To add a new page” on page
133.
2
Press the MENU knob. Then select the item that you
want to replace, and press the MENU knob.
The EDIT FUNCTION page appears.
3
Select MOVE, and press the MENU knob.
The previously displayed page appears again.
4
Select the position to which you want to move the
item, and press the MENU knob.
The item selected in step 2 moves to the position that
you selected in step 4.
To insert a blank line
1
Follow steps 1 to 3 in “To add a new page” on page
133.
2
Press the MENU knob. Then select the item above
which you want to insert a blank line, and press the
MENU knob.
The EDIT FUNCTION page appears.
3
Select BLANK, and press the MENU knob.
The previously displayed page appears again, and a
blank line is inserted above the specified item.
You cannot insert a blank line on a page where 10 items
have already been registered.
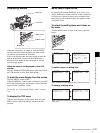
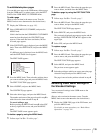
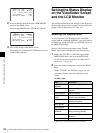
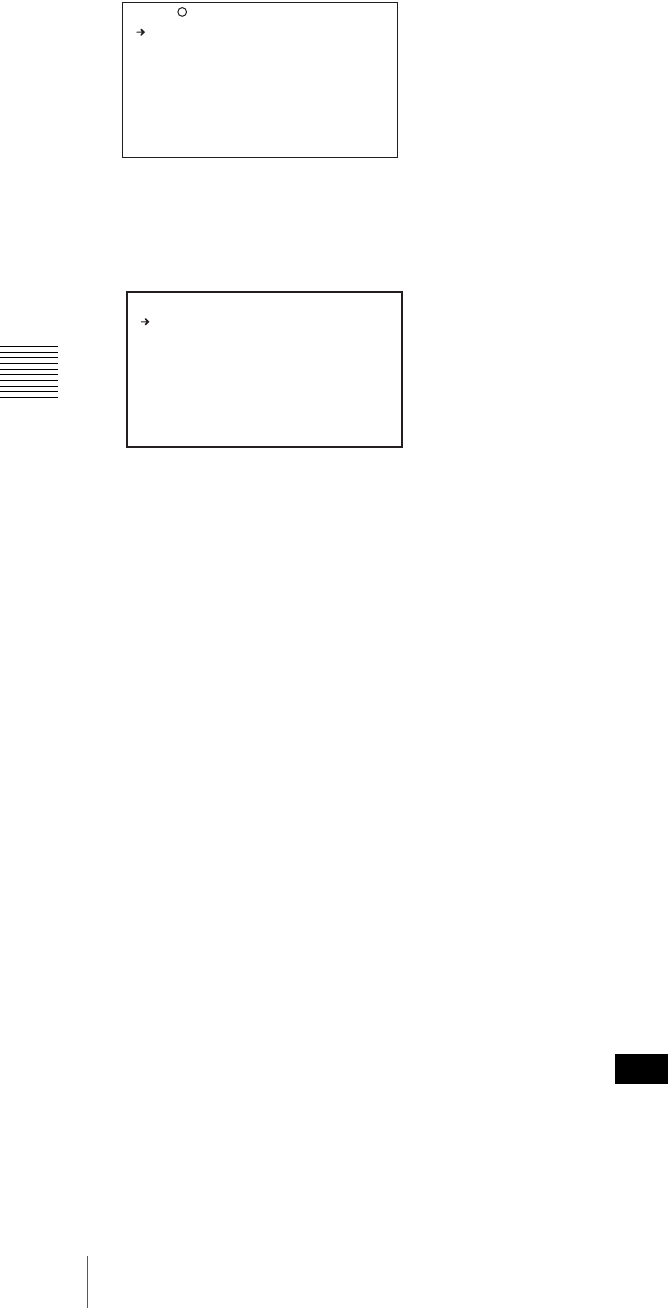
TOP E10 USER 9 EDIT
Example: When the USER 9 EDIT page is selected
ESC EDIT FUNCTION
INSERT
MOVE
DELETE
BLANK
Note