


66
Recording – Basic Operations
Chapter 3 Recording and Playback
1
Select the audio channel that you want to record in.
For details, see “Selection of the recording audio
input” on page 49.
2
Set the AUDIO SELECT (CH-1/CH-2) switch(es)
corresponding to the audio channel(s) selected in step
1 to MANUAL.
3
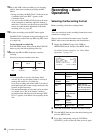
With the AUDIO LEVEL knob on the side control
panel and the AUDIO LEVEL knob on the front,
adjust so that the audio level meter shows up to –20 dB
for a normal input volume.
The input level value of the audio channel 1 is the
value of the AUDIO LEVEL CH-1 knob on the side
control panel multiplied by the value of the AUDIO
LEVEL knob on the front.
The input level value of the audio channel 2 is the
value of the AUDIO LEVEL CH-2 knob.
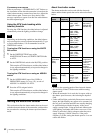
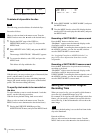
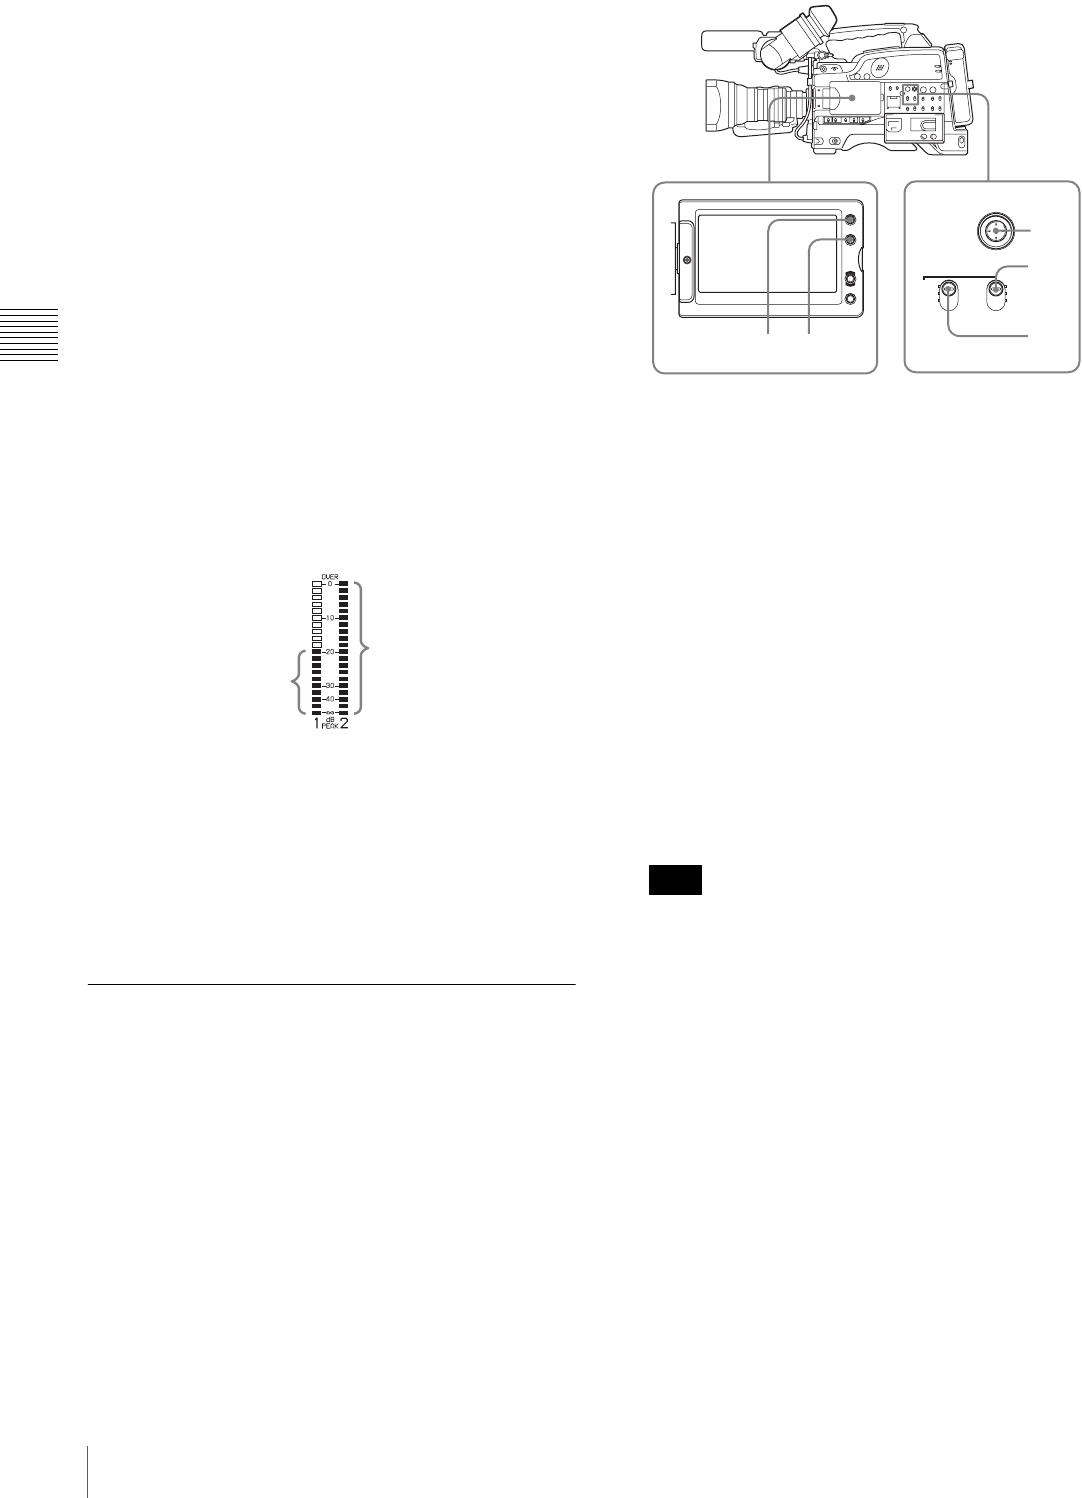
When the top bar (0 dB) turns on, the audio level is too
high. There is no problem if the second bar from the
top turns on.
To adjust manually the level of audio channel 1
without using the AUDIO LEVEL knob on the
front of the camcorder
Set AUDIO CH1 LEVEL to SIDE1 on the AUDIO-1 page
of the MAINTENANCE menu.
The setting of the AUDIO LEVEL knob on the front of the
camcorder is disabled.
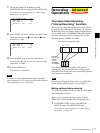
Setting the Time Data
To set the timecode
The timecode setting range is from 00:00:00:00 to
23:59:59:29 (hours: minutes: seconds: frames).
(When the frame frequency is 23.98P: from 00:00:00:00 to
23:59:59:23)
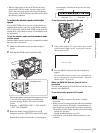
1
Press the DISPLAY/EXPAND button of the LCD
monitor so that the status display appears.
2
Press the COUNTER/CHAPTER button of the LCD
monitor to display TCG on the time counter display
section.
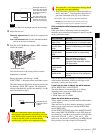
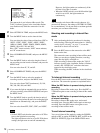
3
Set the PRESET/REGEN/CLOCK switch to PRESET.
4
Set the F-RUN/SET/R-RUN switch to SET.
The first (leftmost) digit of timecode flashes.
5
Use the SEL/SET button (four-way arrow key) to set
the timecode value including the last (rightmost) digit
of the timecode.
To reset the timecode value to 00:00:00:00, press the
RESET button on the right side of the LCD monitor.
When the frame frequency of this unit is 23.98P, a
timecode frame count can only be set to a multiple of
4 (0, 4, 8, 12, 16, or 20).
6
Set the F-RUN/SET/R-RUN switch to the desired
operating mode for the timecode generator.
F-RUN: Free run. The timecode generator keeps
running.
R-RUN: Recording run. The timecode generator runs
only while recording.
To set the DF (drop-frame)/NDF (non-drop-frame)
mode
You can select the drop-frame (DF) mode or non-drop-
frame (NDF) mode on the TIME CODE page of the
MAINTENANCE menu.
These bars turn on.
Normal input level
Excessive input level
All bars turn on.
Note
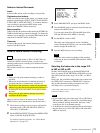
PRESET F-RUN
REGEN
SET
CLOCK R-RUN
SUB CLIP
CLIP MENU
SEL/SET
1 2
3
5
4,6