


Locations and Functions of Parts and Controls
16
Chapter 1 Overview
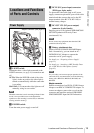
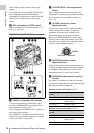
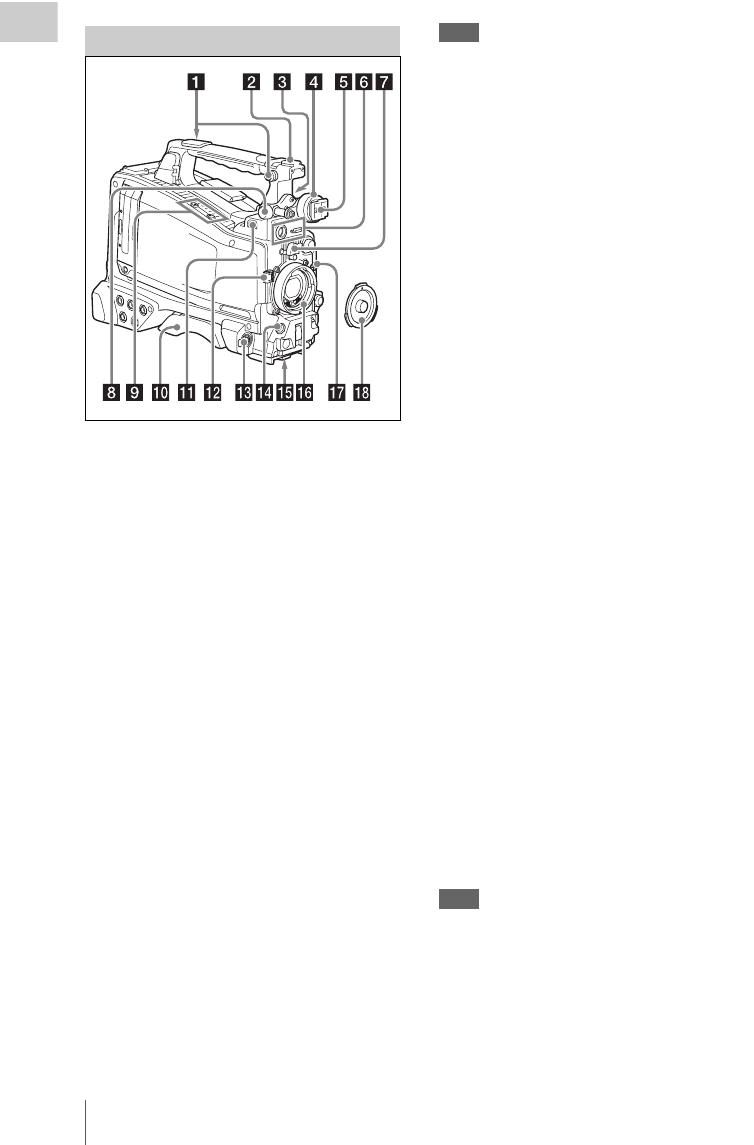
a Shoulder strap fitting
Attach the supplied shoulder strap (see page 49).
b Accessory fitting shoe
Attach an optional accessory such as a video light
(see page 49).
c Viewfinder front-to-back positioning
lever
To adjust the viewfinder position in the front-to-
back direction, loosen this lever and the LOCK
knob. After adjustment, retighten this lever and
the LOCK knob.
d Viewfinder left-to-right positioning ring
Loosen this ring to adjust the left-to-right position
of the viewfinder (see page 37).
e Viewfinder fitting shoe
Attach the viewfinder.
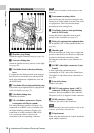
f VF (viewfinder) connectors (26-pin,
rectangular and 20-pin, round)
The analog interface connector (20-pin) is for
connection of an HDVF series viewfinder, and
the digital interface connector (26-pin) is for
connection of an HD viewfinder CBK-VF01.
Use a connection cable to connect your
viewfinder to the corresponding connector.
Note
Do not connect viewfinders to both connectors at the
same time.
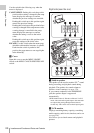
g Lens mount securing rubber
After locking the lens in position using the lens
locking lever, fit this rubber over the lower of the
two projections. This fixes the lens mount,
preventing it from coming loose.
h Viewfinder front-to-back positioning
knob (LOCK knob)
Loosen this knob to adjust the front-to-back
position of the viewfinder (see page 37).
i Fitting for optional microphone holder
Fit an optional CAC-12 Microphone Holder (see
page 44).
j Shoulder pad
Raise the shoulder pad fixing lever to adjust the
position in the front-to-rear direction. Adjust the
position for maximum convenience when
operating the camcorder on your shoulder (see
page 50).
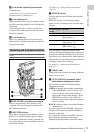
k LIGHT (video light) connector (2-pin,
female)
A video light with a maximum power
consumption of 50 W, such as the Anton Bauer
Ultralight 2 or equivalent can be connected (see
page 49).
l Lens cable clamp
Clamp a lens cable.
m MIC IN (microphone input) (+48 V)
connector (XLR type, 5-pin, female)
Connect a stereo microphone to this connector.
The power (+48 V) is supplied via this connector.
n LENS connector (12-pin)
Connect a lens cable to this connector.
Note
When connecting or disconnecting the lens cable to this
connector, power off the camcorder first.
o Tripod mount
When using the camcorder on a tripod, attach the
tripod adaptor (optional).
Accessory Attachments