


Preparing the Audio Input System
43
Chapter 2 Preparations
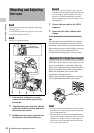
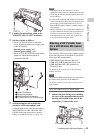
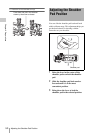
Carrying out the adjustment
1 Set the iris to manual.
2 Open the iris, position the supplied
flange focal length adjustment chart
approximately 3 meters (10 ft) away
from the camcorder, and arrange the
lighting to obtain a satisfactory video
output.
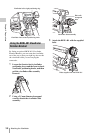
3 Loosen the fixing screws on the F.f or
F.B ring (flange focal length adjustment
ring).
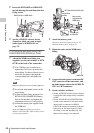
4 Use manual or power zoom to set the
lens to telephoto.
5 Point the camcorder at the chart by
turning the focus ring and focus on it.
6 Set the zoom ring to wide angle.
7 Turn the F.f or F.B ring until the chart
is in focus, being careful not to disturb
the focus ring.
8 Repeat steps 4 to 7 until the chart stays
in focus all the way from wide angle to
telephoto.
9 Tighten the F.f or F.B ring fixing
screws.
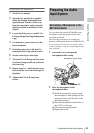
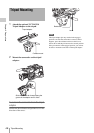
You can attach the optional ECM-680S stereo
microphone to the microphone holder of the
viewfinder (optional).
The following procedure is an example for
attaching a microphone holder to the HDVF-20A.
For procedures for attaching a microphone holder
to other viewfinders, refer to a manual supplied with
each viewfinder.
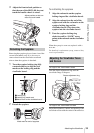
1 Loosen the screw and open the
microphone holder clamp.
2 Place the microphone in the
microphone holder.
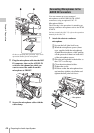
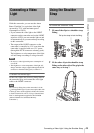
1 Wind the microphone spacer around
the microphone, while peeling off the
protective sheets on both sides of the
microphone spacer.
2 Place the microphone in the holder so
that “UP” is at the top.
3 Close the microphone holder.
4 Tighten the screw.
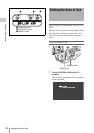
Preparing the Audio
Input System
Connecting a Microphone to the
MIC IN Connector
Microphone holder clamp