


Configuring a Shooting and Recording System
173
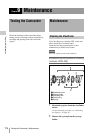
Chapter 8 Connecting External Devices
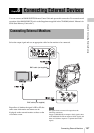
2 Make the following settings with
OPERATION >Input/Output in the
setup menu (see page 114).
• Set Output&i.LINK to [HD&HDV] or
[SD&HDV].
• Set i.LINK I/O to [Enable].
• Set Source Select to [i.LINK].
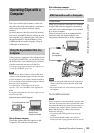
The input video is displayed on the
viewfinder screen or the monitor connected
to the
VIDEO OUT connector.
Audio signals are output through the built-in
speakers, the headphones connected to the
EARPHONE connector, and the speakers of
the monitor connected to the
VIDEO OUT
connector.
3 Start the recording.
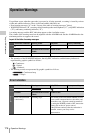
Notes
• An error is generated in the following cases. In such a
case, cancel Recording mode.
- The video format of input signal does not match that
specified on the camcorder.
- A copy-protected stream is being fed in.
• If the input to the camcorder becomes no signal during
recording, the TALLY indicators, the tally indicator on
the front of the viewfinder, and the REC indication
(zREC) on the viewfinder screen flash, indicating that
no signal is being recorded on the SxS memory card.
When an input signal is resumed, recording is
restarted, incrementing the clip number on the memory
card.
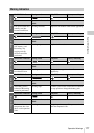
If you install the optional CBK-HD02 on this
camcorder, you can attach the XDCA-55 HD
Camera Adaptor and connect the XDCU-50 HD
Camera Extension Unit.
This allows you to configure a shooting and
recording system consisting of multiple
camcorders with camera extension units
connected to a remote control unit.
For more information about the XDCA-55 and
XDCU-50, refer to their respective operation
manuals.
Note
When using the camcorder in this system, do not connect
a video light to the camcorder.
Configuring a Shooting
and Recording System