


22
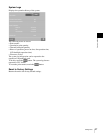
Setting Items
Chapter 3 Setup
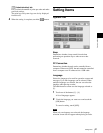
Touch Panel Adjustment
This allows you to calibrate the touch panel.
Touch the button, and then touch the box that
appears on the screen. When you touch the box, a new box
appears in a different location. Touch each of the boxes in
order. When no more boxes appear, the touch panel
adjustment is complete.
Print Head Cleaning
This allows you to clean the inside of the printer.
For details, refer to the operating instructions for the
supplied cleaning cartridge.
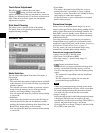
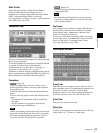
Screens Tab
Mode Selection
You can select either Quick Print mode, Full mode, or
Event mode.
•Quick Print
This mode limits the number of options that are available
to the customer. It is best suited to allow easy and quick
printing of photos.
The customer can select whether to print only selected
images from the memory card or all images on the
memory card. Image editing is not possible.
You can require the input of a password before printing
is carried out.
•Full Mode
In this mode, the customer can access the full range of
functions provided by the unit. In addition to normal
printing, this includes Split Image print, Index Print, and
Border Print. Image editing is also possible.
You can require the input of a password before printing
is carried out.
• Event Mode
This mode is designed for providing free access to
printing functions, for example at a party, wedding
reception, or similar. The mode is also suitable for use by
shop employees rather than customers.
No password entry or price confirmation are required
before starting to print.
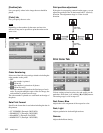
Promotional Images
Allows you to set the promotional images. Up to two
images can be specified for display during standby in Full
mode or Quick Print mode. In the default condition, the
Start Guide is used as standby screen. When one or two
images have been specified, these are shown alternately
with the Start Guide.
To use the promotional image function, an expansion
CompactFlash card is required. For information on the
expansion CompactFlash card, see the section “Preparing
an Expansion CompactFlash Card” on page 17.
You may create your own promotional image using
commercially available photo editing software.
Promotional image specifications
• Image size: 640 (W) × 480 (H) pixels
• File format: 24-bit Windows BMP
• File name: Image 1 = promo1.bmp, Image 2 =
promo2.bmp
• (Import promotional image)
This button lets you import a promotional image from
memory card inserted front-side memory card slot.
If an error message appears, check the following likely
causes.
– The expansion CompactFlash card has insufficient
free space.
– The file selected for copying does not meet the
promotional image specifications.
If there are promotional images already stored on the
expansion CompactFlash card, they will be overwritten.
Be careful when performing this procedure, because
even read-only files will be forcibly overwritten.
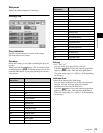
• Image 1, Image 2
Selects the time period for which the promotional image
is displayed. When the time has elapsed, the unit
automatically switches to the next image. When [OFF] is
selected, the promotional image is not shown.
It is not possible to set Image 1, Image 2, and Start Guide
all to [OFF] at the same time.
Note