


Chapter 2: Installation
2-15
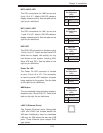
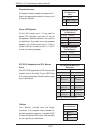
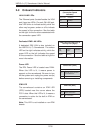
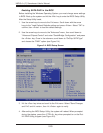
LAN1/2 Enable/Disable
Change the setting of jumper JPL1 and JPL2
to enable or disable the LAN1 and LAN2
Ethernets ports, respectively. See the table
on the right for jumper settings. The default
setting is enabled.
LAN1/2 En/Disable
Jumper Settings
(JPL1/JPL2)
Jumper Setting Defi nition
Pins 1-2 Enabled
Pins 2-3 Disabled
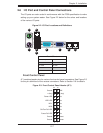
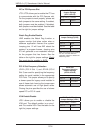
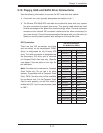
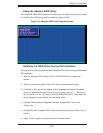
Compact Flash Master/Slave Select
A Compact Flash Master (Primary)/Slave
(Secondary) Select Jumper is located at
JCF1. Close this jumper to enable Compact
Flash Card. For the Compact Flash Card
or the Compact Flash Jumper (JCF1) to
work properly, you will need to connect the
Compact Flash Card power cable to JWF1
fi rst. Refer to the board layout below for the
location.
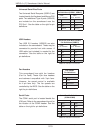
Compact Flash Card Master/
Slave Select (JCF1)
Jumper Setting Defi nition
Open Slave (Secondary)
Closed Master (Primary)
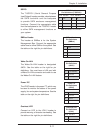
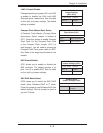
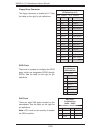
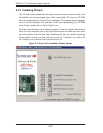
SAS Enable/Disable
Jumper Settings (JPS1)
Jumper Setting Defi nition
Pins 1-2 Enabled
Pins 2-3 Disabled
SAS Enable/Disable
JPS1 allows you to enable or disable the
SAS controller. The default position is on
pins 1 and 2 to enable SAS. See the table
on the right for jumper settings.
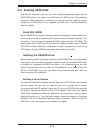
Software RAID
Jumper Settings (JPS2)
Jumper Setting Defi nition
Close Software RAID
Enabled
Open IT Mode Enabled
SAS RAID Mode Select
JPS2 allows you to select the SAS RAID
mode, either Software RAID or IT Mode.
Close this jumper to use Software RAID (the
default setting). Set this jumper to open to
use the IT Mode.