


100
1
2
3
4
5
6
7
8
9
Cover
PreliminaryNotesand
LegalInformation
Contents:
BasicOperations
AdvancedGuide
CameraBasics
SmartAuto
Mode
OtherShooting
Modes
PMode
Wi-FiFunctions
SettingMenu
Accessories
Appendix
Index
BasicGuide
PlaybackMode
Cover
AdvancedGuide
6
Wi-FiFunctions
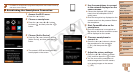
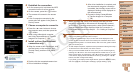
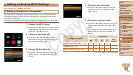
4 Usetheprintertoconnectto
thenetworkdisplayedonthe
camerascreen.
Choose the displayed SSID (network
name) from the printer’s Wi-Fi setting
menu.
Enter the encryption key displayed on the
camera screen into the password eld on
the printer.
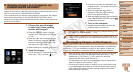
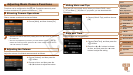
5 Choosetheprinter.
Once the printer is ready for the
connection, press the <m> button when
the printer name is displayed on the
camera.
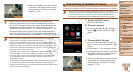
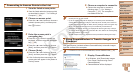
When the printer has been added
successfully, the printing screen will be
displayed.
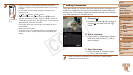
6 Chooseanimagetoprint.
Press the <q><r> buttons to choose an
image.
Press the <m> button, choose [c], and
press the <m> button again to access
the printing screen.
Press the <o><p> buttons to choose
[Print], and then press the <m> button.
Printing now begins.
For detailed printing instructions, see
“Printing Images” (=
117).
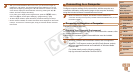
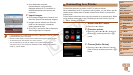
•When you are in the vicinity of an access point that you have
previously connected to, the camera will automatically connect
to it in step 3. To change access points, select [Switch Network]
from the screen that will be displayed when the connection is
being established, and follow steps 4 – 5 in “Adding a Computer”
(=
96).
•You can connect to printers that you have already connected to by choosing
them on the [Select a Device] screen in step 3.
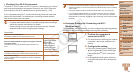
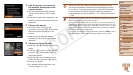
•After you have accessed the Wi-Fi menu once, you can access it again by
pressing the <o> button. The recent target device is listed rst, so you can
easily connect again by pressing the <o><p> buttons to choose it. To add
a new device, display the device selection screen by pressing the <q><r>
buttons, and then congure the setting.
If you prefer not to display recent target devices, press the <n> button,
and on the [3] tab, choose [Wi-Fi Settings] > [Target History] > [Off].
C OPY