


58
1
2
3
4
5
6
7
8
9
Cover
PreliminaryNotesand
LegalInformation
Contents:
BasicOperations
AdvancedGuide
CameraBasics
SmartAuto
Mode
OtherShooting
Modes
PMode
Wi-FiFunctions
SettingMenu
Accessories
Appendix
Index
BasicGuide
PlaybackMode
Cover
AdvancedGuide
4
PMode
Still Images Movies
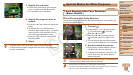
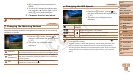
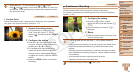
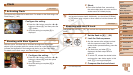
CustomWhiteBalance
For image colors that look natural under the light in your shot, adjust white
balance to suit the light source where you are shooting. Set the white
balance under the same light source that will illuminate your shot.
Follow the steps in “Adjusting White
Balance” (=
57) to choose [ ].
Aim the camera at a plain white subject,
so that the entire screen is white. Press
the <n> button.
The tint of the screen changes once the
white balance data has been recorded.
•Colors may look unnatural if you change camera settings after
recording white balance data.
Still Images Movies
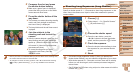
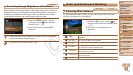
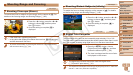
Changing Image Color Tones (My Colors)
Change image color tones as desired, such as converting images to sepia
or black and white.
Press the <m> button, choose [ ] in
the menu, and choose the desired option
(=
27).
The option you congured is now
displayed.
My Colors Off ―
Vivid
Emphasizes contrast and color saturation, making images sharper.
Neutral
Tones down contrast and color saturation for subdued images.
Sepia Creates sepia tone images.
B/W Creates black and white images.
Positive Film
Combines the effects of Vivid Blue, Vivid Green, and Vivid
Red to produce intense yet natural-looking colors resembling
images on positive lm.
Lighter Skin Tone Lightens skin tones.
Darker Skin Tone Darkens skin tones.
Vivid Blue
Emphasizes blues in images. Makes the sky, ocean, and other
blue subjects more vivid.
Vivid Green
Emphasizes greens in images. Makes mountains, foliage, and
other green subjects more vivid.
Vivid Red
Emphasizes reds in images. Makes red subjects more vivid.
Custom Color
Adjust contrast, sharpness, color saturation, and other
qualities as desired (=
59).
C OPY