


28 29
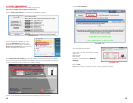
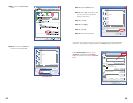
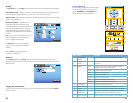
STEP 3. To configure the DVR to detect motion:
• Select ON or OFF from the STATUS drop down menu to enable or disable motion
detection on each camera
• Select LOW, MEDIUM, HIGH, or HIGHEST from the SENSITIVITY drop down menu
to set the sensitivity of the motion detection
• Click SETUP for each camera next to MD AREA, which allows the definition of the
area to be detected for motion and when any object moves in the designated area,
recording will be triggered.
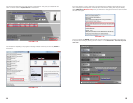
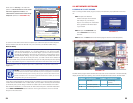
PTZ Control
The PTZ tab on the Setup menu allows the configuration of the PTZ camera options. Use
the following instructions to configure each PTZ camera. You will need to have your camera’s
manual at hand.
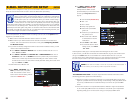
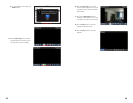
Image 39
• On the area selection grid select each
square to enable motion detection
for each area. Squares will turn
red to indicate that motion will be
detected in that area. Recording
will not be triggered when motion
occurs in areas that have not been
selected.
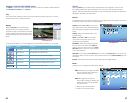
PICTURE 2-22
PICTURE 2-23
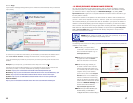
The Video Loss option creates a notification if the system loses video feed for any reason,
such as camera damage, disconnected camera cables or a power supply malfunction.
• Select ON to generate an alarm buzzer when video loss occurs.
• Select OFF to turn this buzzer notification off.
The HDD Space pull down menu allows you to choose whether an alarm buzzer will sound
when the HDD is running low on available storage space.
• Select ON to enable the alarm buzzer.
• Select OFF to turn this buzzer notification off.
The HDD Loss option enables an alarm notification when the system has lost its connection
with the Hard Disk Drive, or if the drive has failed for some reason.
• Select ON to enable the alarm buzzer.
• Select OFF to turn this buzzer notification off.
The Alarm Manage option allows you to configure how long each sounding of the external
alarm (if any) and internal buzzer will continue. It also allows you to setup how long you want
the system to continue to record after the alarm ends (post record).
• Select 0 seconds, 10 seconds, 20 seconds, 40 seconds, or 60 seconds from
the Output drop down menu.
• Post Rec: This sets how long to record after the alarm ends, Select 0
seconds, 30 seconds, 1 minute, 2 minutes or, 5 minutes
The DEFAULT button will reset all Alarm options to their original factory installed settings
Select APPLY to save settings before continuing to another tab.
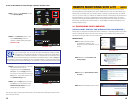
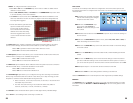
STEP 1. Select the channel(s) associated
with the PTZ camera(s) and configure
all options under that column
STEP 2. From the PROTOCOL drop-
down menu, select Pelco-D or
Pelco-P, to match the settings on the
PTZ camera
STEP 3. Select the number from the ADDRESS drop down list, to match the settings on
the PTZ camera
STEP 4. From the BAUD RATE drop down menu, select 1200, 2400, 4800 or 9600, to
match the settings on the PTZ camera
STEP 5. From the DROP BIT drop down menu select the number to match the settings
on the PTZ camera
STEP 6. From the STOP BIT drop down menu select 1 or 2, to match the settings on the PTZ
camera
STEP 7. From the VERIFY drop down menu match the settings on the PTZ camera If
you have a verification setting on the control board then set this option to match it, if
you do not have this option on the PTZ camera control board then leave it set to OFF.
STEP 8. Repeat steps 2-7 for each PTZ camera connected to the DVR
STEP 9. Select APPLY to save settings before continuing to another tab.
Select the DEFAULT button to reset all options to their original factory installed settings
Network
The NETWORK tab on the Setup menu allows you to view the network settings you made
in the DVR. Please see Section 1.1 Network Settings at the front of this guide for more
information.