


8 9
PICTURE 1-11
PICTURE 1-12
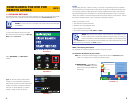
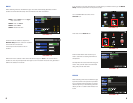
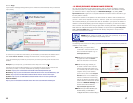
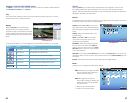
DHCP
When selecting DHCP as the Network type, the router automatically generates a DVR IP
address once the Network Setup menu is exited and the DVR is restarted.
STEP 1. Select DHCP from the Type
drop-down menu,
STEP 2. Click on APPLY
STEP 3. Select EXIT.
STEP 4. Restart the DVR.
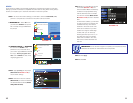
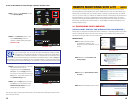
Once the DVR has restarted, reopen the
Network Setup window and the IP address
of the DVR will now be listed.
Forward ports 80 and 9000 to this IP
address.
1
2 3
UPNP OFF
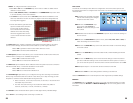
Write down this IP address. Then switch the Network Type to “Static” and re-enter the IP
address to avoid any discrepancies that might occur in the event the router auto generates a
different IP address in the future.
PICTURE 1-15
PICTURE 1-16
PICTURE 1-13
PICTURE 1-14
UPNP OFF
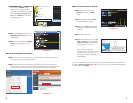
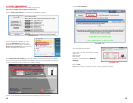
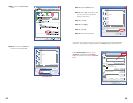
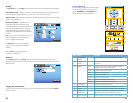
If you are going to access the DVR from a smart phone you will also need to go the Mobile
Setup and set up the DVR for smart phone access.
Go to the Main Menu and click on the
DEVICES icon.
Then click on the MOBILE icon.
Enter the User Name and Password you
wish to use when accessing the DVR via a
smartphone.
Smartphones will access the DVR using port
18004. This port will need to be forwarded
along with ports 80 and 9000.
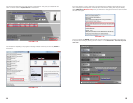
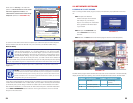
PPPOE
When selecting PPPoE as the Network type,
input the username and password provided
by your internet service provider. You would
use this option if you are attaching the DVR
directly to DSL or cable modem instead of a
router.