


40 41
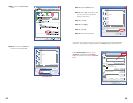
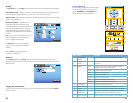
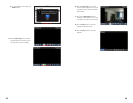
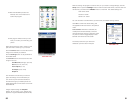
3. When the program launches it will
open the main interface, the Live
Display, which will include the
controls for the DVR.
# Function
1 Connect/Disconnect
2 Full Screen
3 Snapshot
4 Setup
5 Help
6 Channel Selection
7 PTZ Control
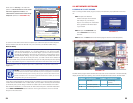
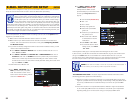
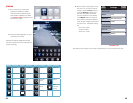
4. In the Settings Menu, you will enter
the same User Name, Password
and Port number that you entered
in the Mobile window on the DVR
along with the IP address obtained
when you first configured the DVR
for remote access along with the
IP address obtained when you first
configured the DVR for remote
access. The default settings are:
User name: admin
Password: admin
Server Port: 18004
PICTURE 4-17
PICTURE 4-18
PICTURE 4-19
PICTURE 4-20
PICTURE 4-21
PICTURE 4-22
PICTURE 4-23
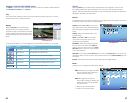
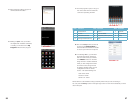
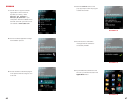
A. Select the Network Type (3G or
WiFi) supported by the phone.
B. Click the Save button to save the
above setting, and system will return
back to Live display
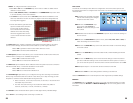
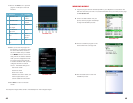
C. Click the History button to enter
into the History List.
D. Highlight one record and click
the Enter button to bring up the
pop-up menu. When selecting
the Open option, the system will
directly connect to the DVR and
will display Channel 1 by default.
E. When selecting the Edit option, the
system will allow you edit the history
record