


E-57
W
T
START/
STOP
POWER
OFF
ON
MODE
CAM-B
VTR
SHUTTER
GAIN
CAM-A
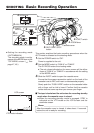
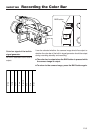
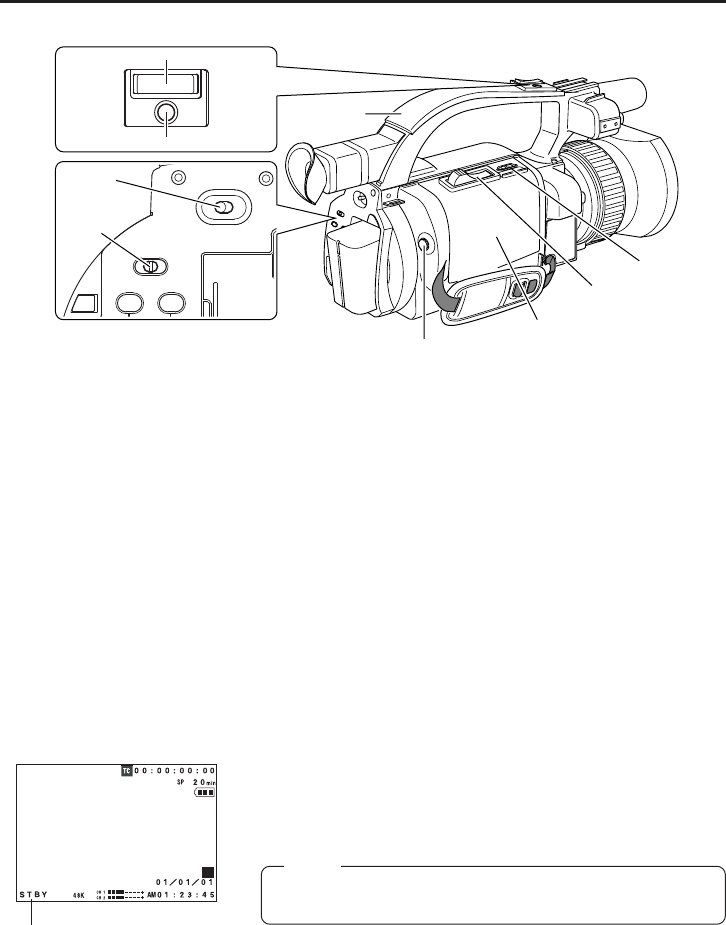
SHOOTING Basic Recording Operation
2.
MODE
switch
3.
EJECT switch
4.
ZOOM lever
4.
ZOOM lever
5.
REC START
/STOP button
5.
REC START/STOP
button
Cassette cover
Handle
● Setting the recording mode
(AUTO/MANUAL)
The recording mode is set by
means of the MODE item on the
TOP MENU screen. (
☞
See
page 47, 48.)
This section explains the basic recording procedures when the
AUTO mode is selected as the shooting mode.
1.
Set the POWER switch to “ON”.
Power is supplied to the unit.
2.
Set the MODE switch to “CAM-A” or “CAM-B”.
The GY-DV300 enters the shooting mode.
● The set values indicated on the menu screen will be either
those of “CAM-A” or “CAM-B” in accordance with the setting
of the MODE switch.
3.
Slide the EJECT switch to open the cassette cover.
Ensure that the erasure-prevention switch on the back of the
cassette is set to REC and insert a videocassette properly.
Slowly push the “PUSH HERE” section on the cassette holder
with a finger until a click is heard. Confirm that the cassette
holder does not come up when you remove your finger.
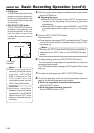
Ⅵ The tape is loaded and the unit enters the recording-standby
mode when the cassette cover is closed.
● When the recording-standby mode is engaged, STBY is
indicated as the VTR mode on the LCD screen and the
viewfinder screen.
A
VTR mode indication
LCD screen
Memo:
After the cassette cover is closed, it takes about 11 seconds
before the unit is ready for recording.
1.
POWER
switch